1. Create an Account
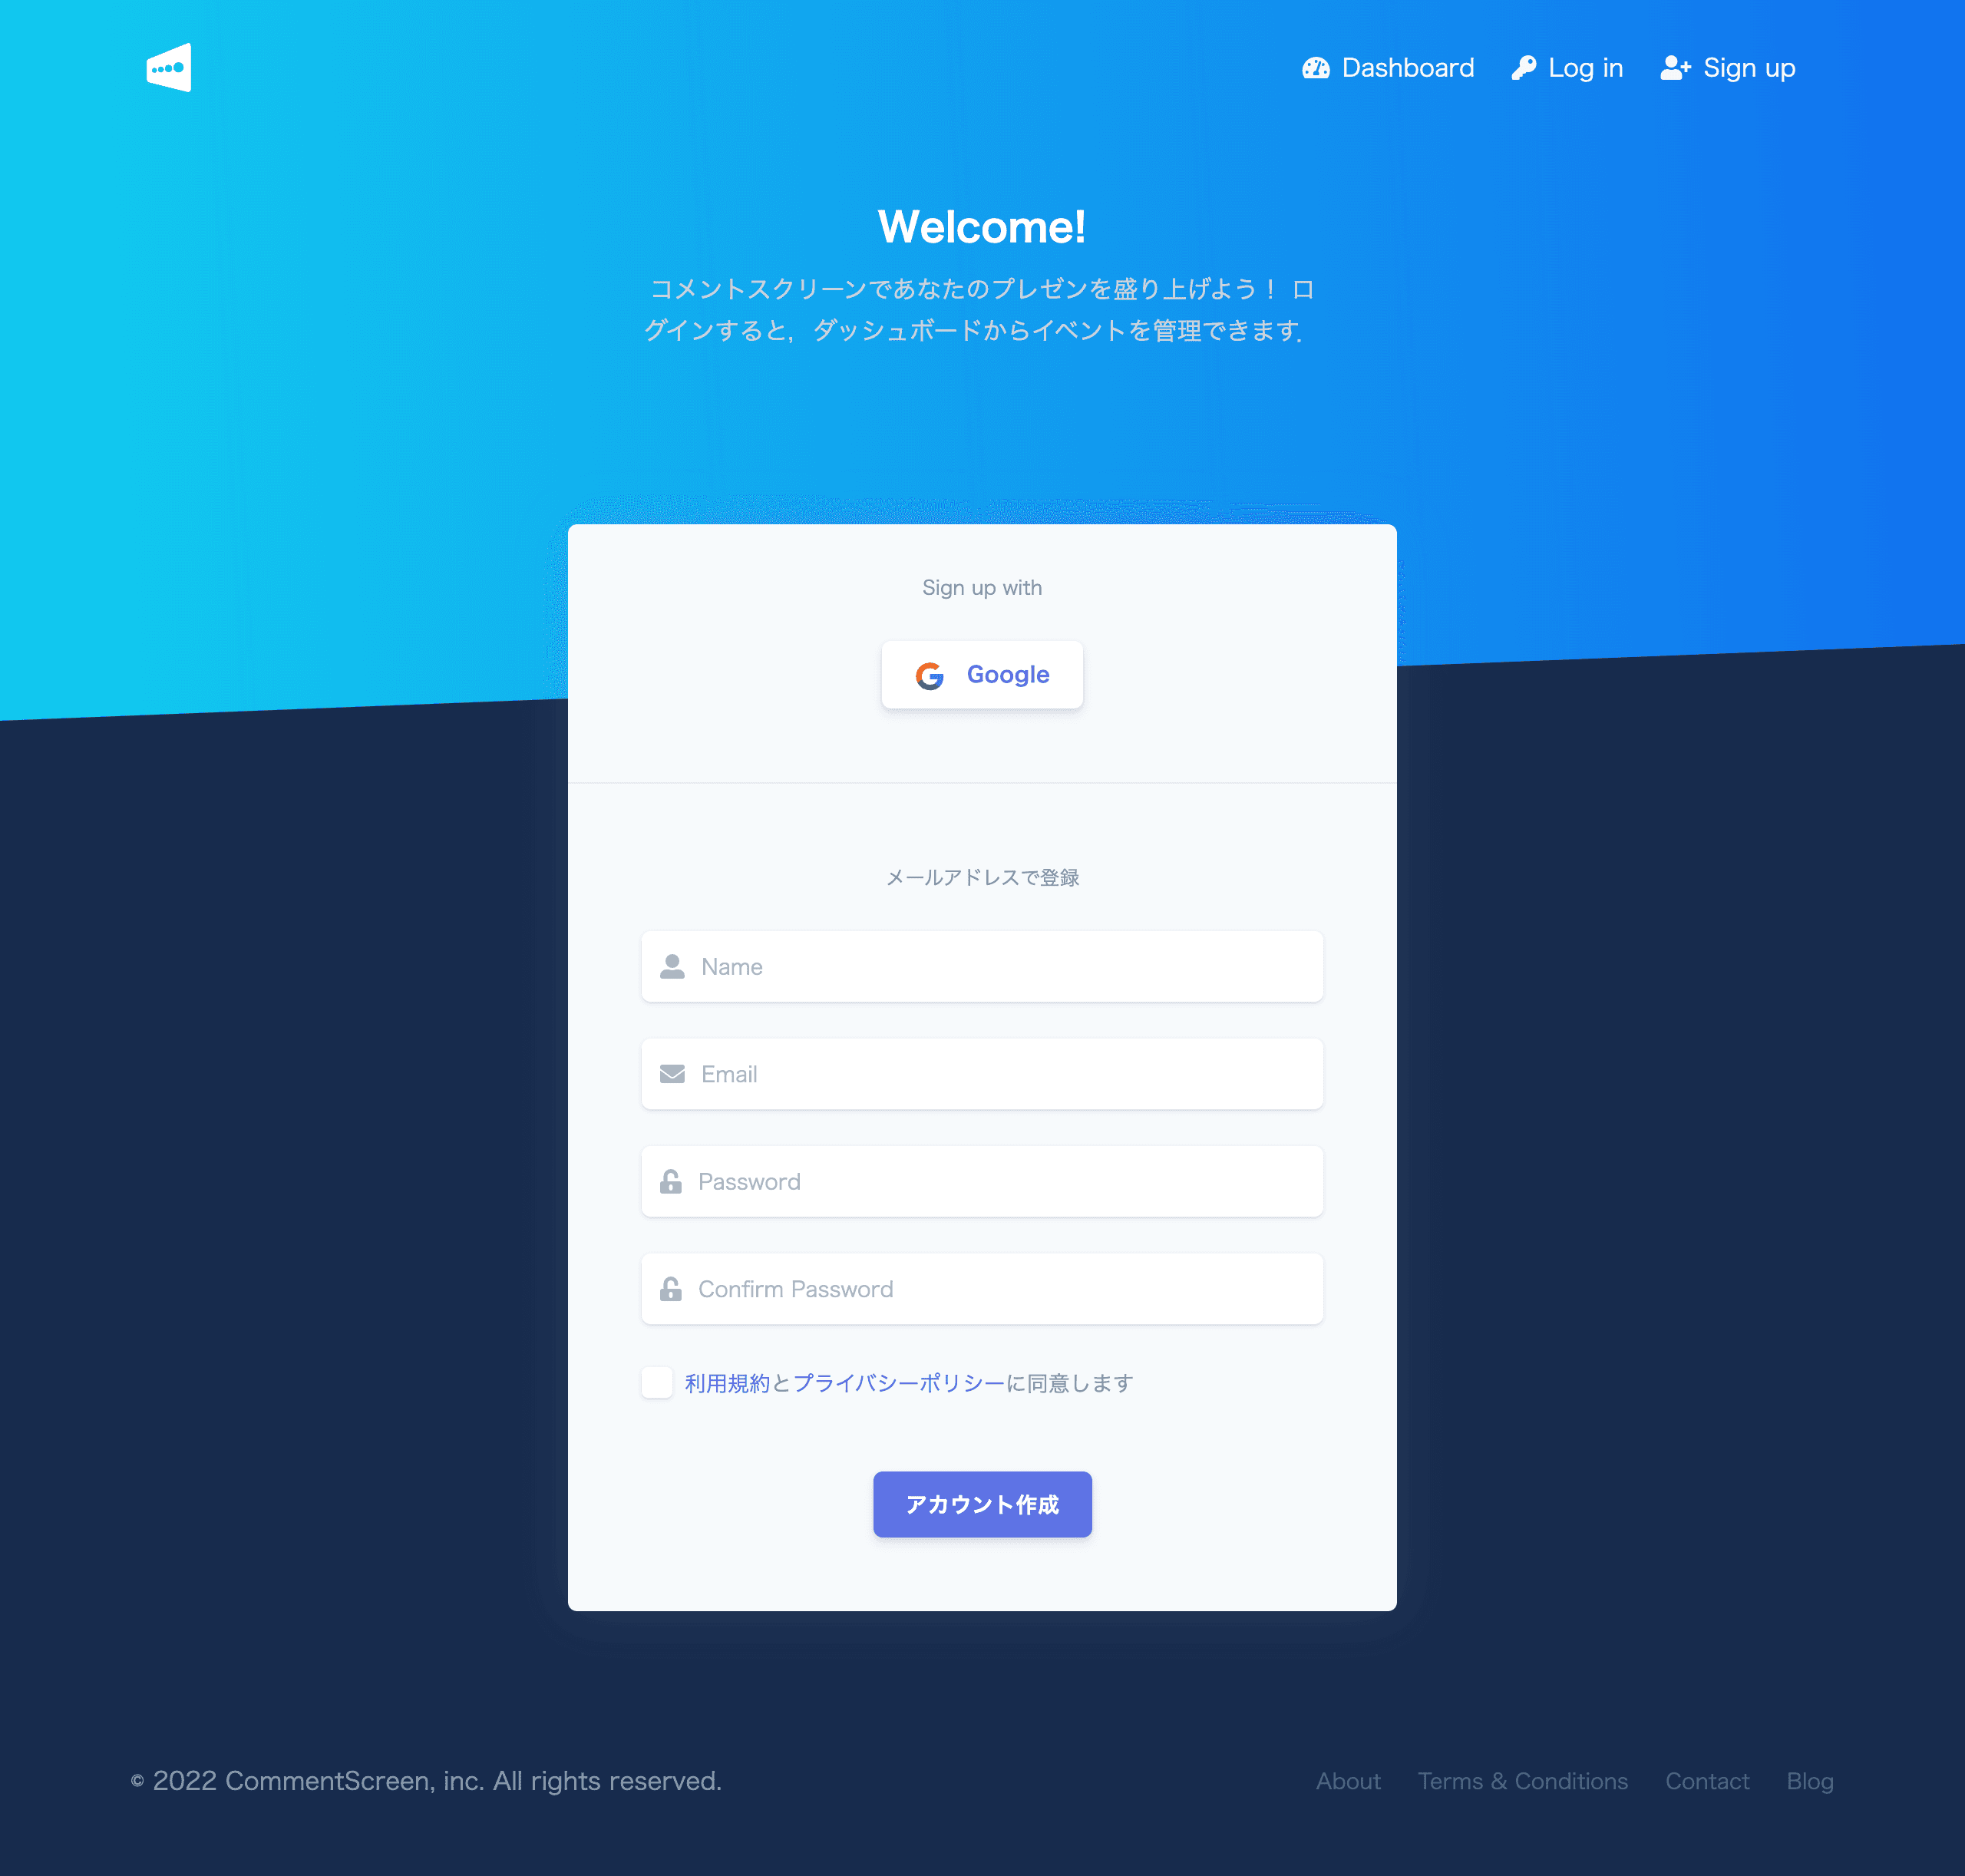
Step 1. Click Sign up at the top right of the home page to open the registration page.

Step 2. Enter the required information in the form.
Step 3. Read the Terms of Service and Privacy Policy. If you agree, select the checkbox and click Create account.
Step 4. Open the verification link sent to the email address you entered.
Step 5. Sign in with the email address and password you set.
Your account is now ready.
2. Create a Room
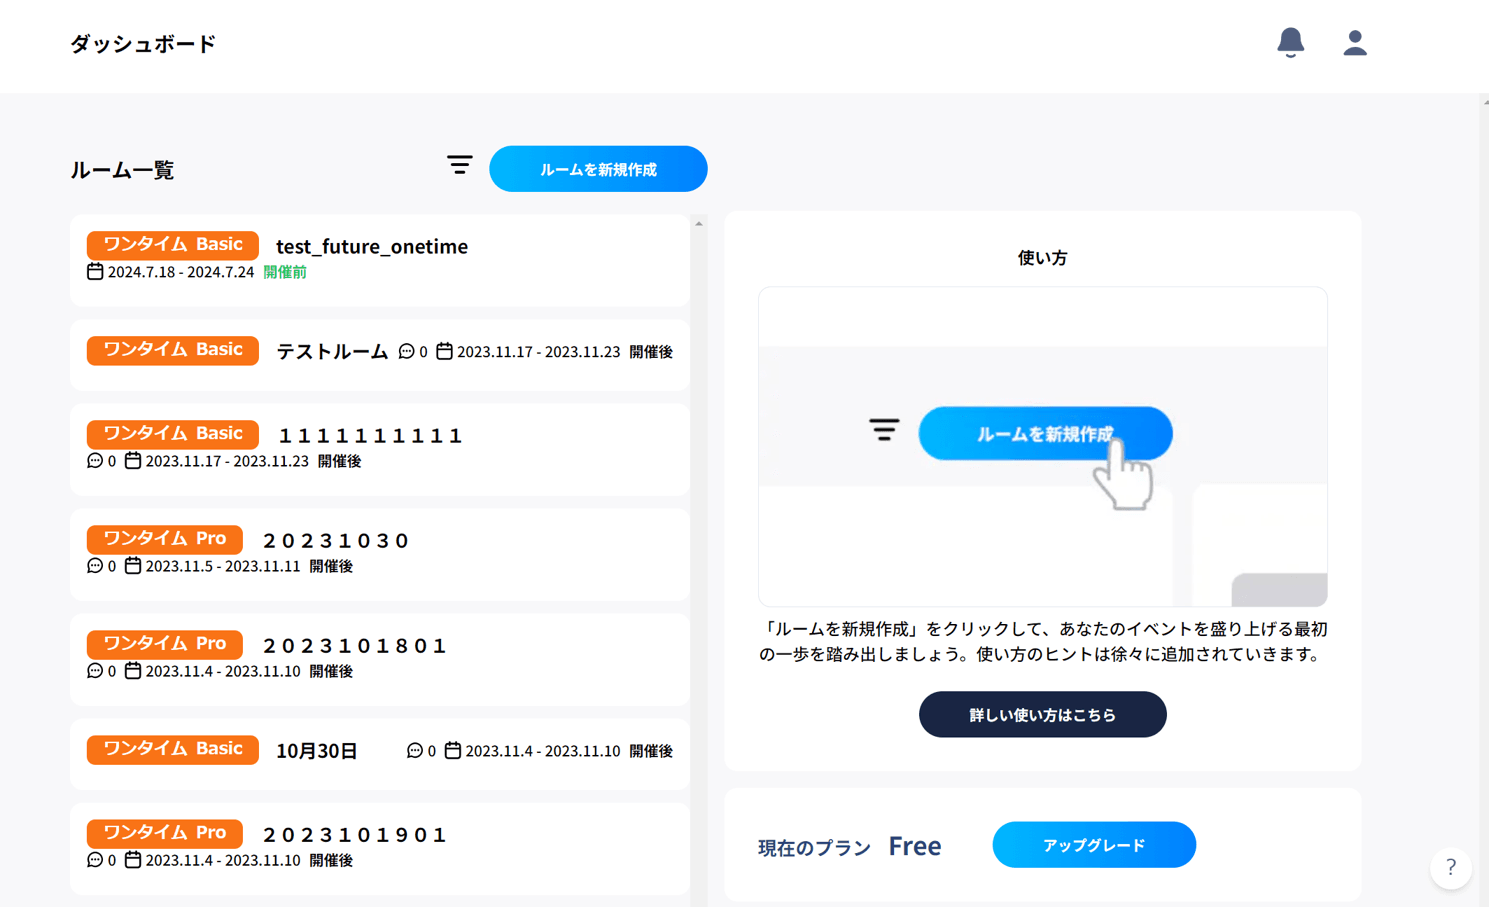
Step 1. While signed in, click Create a new room.
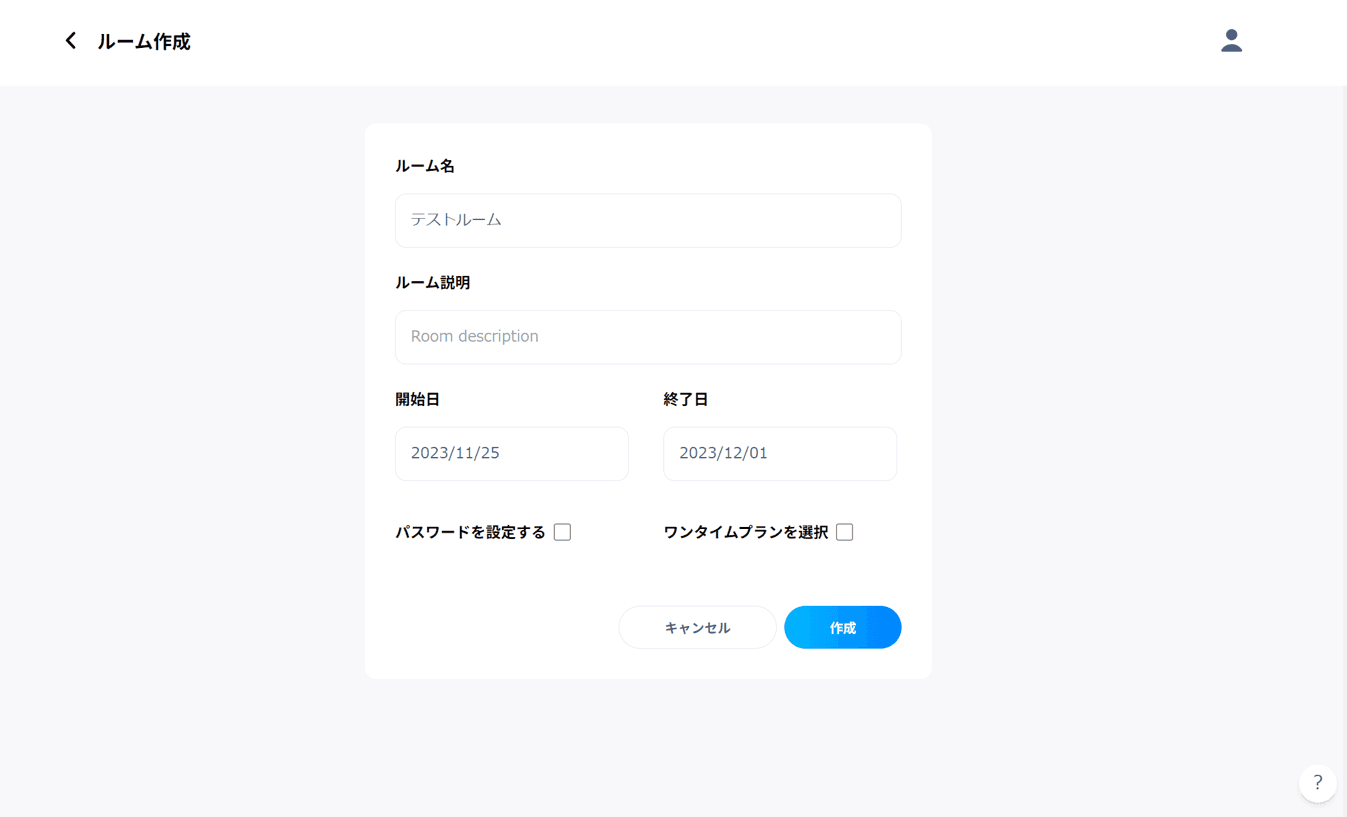
Step 2. Enter the room details and click Create. The room takes a few seconds to create.
Select Set a password to restrict entry to participants who know the password.
You can set a period of up to seven days from the start date to the end date.
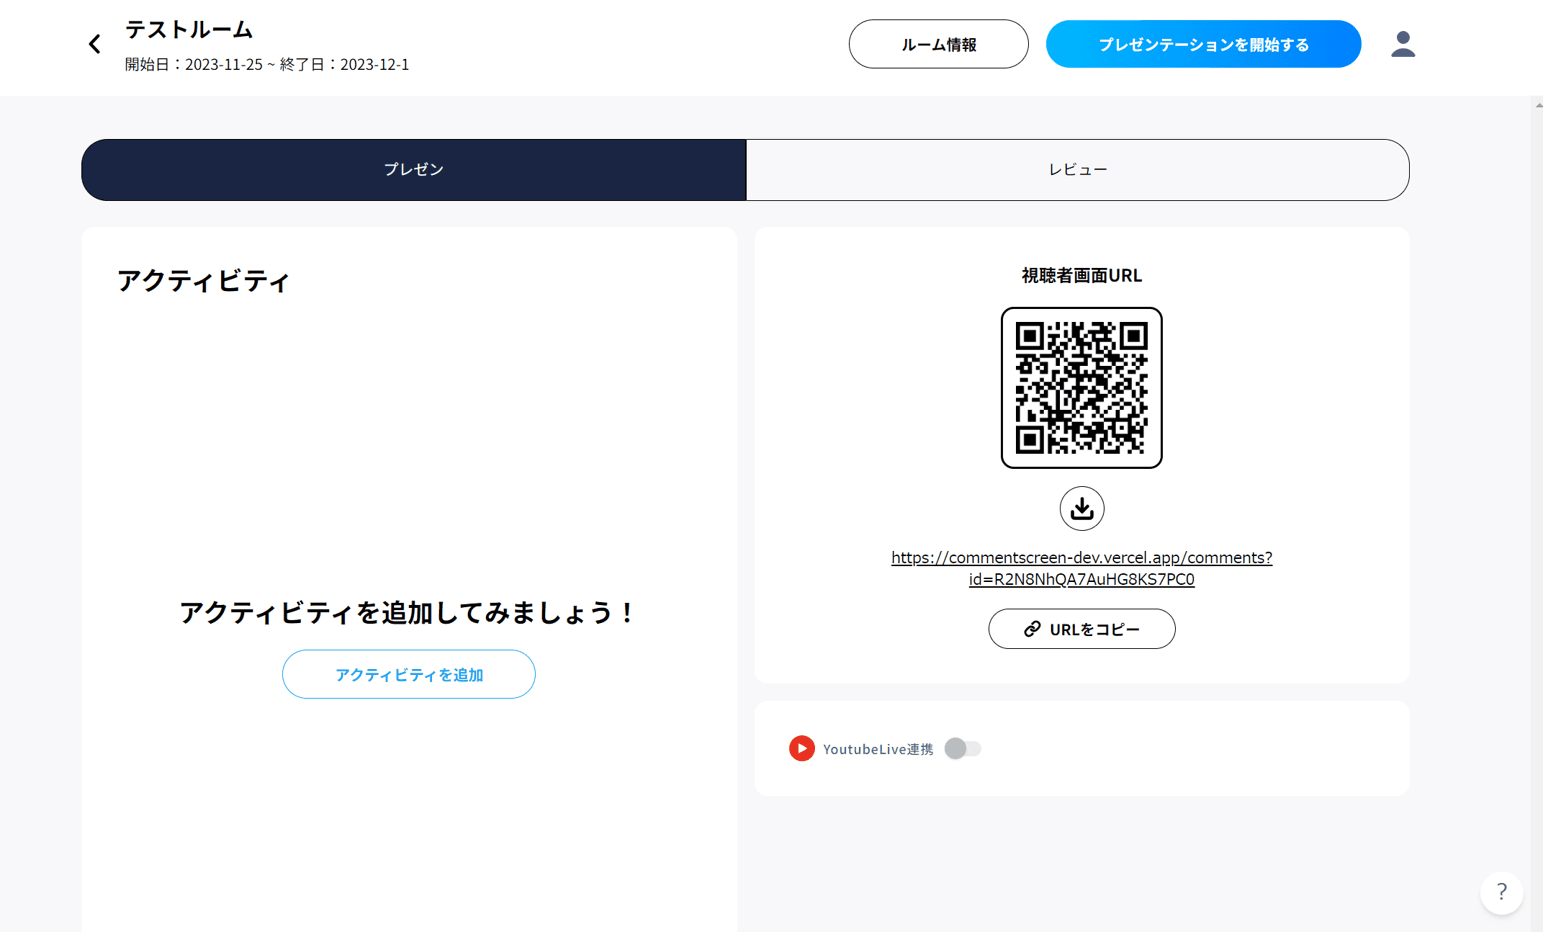
Step 3. Wait a few seconds. When the room details page appears, the room is ready.
3. Invite Participants
Invite with a QR Code or URL
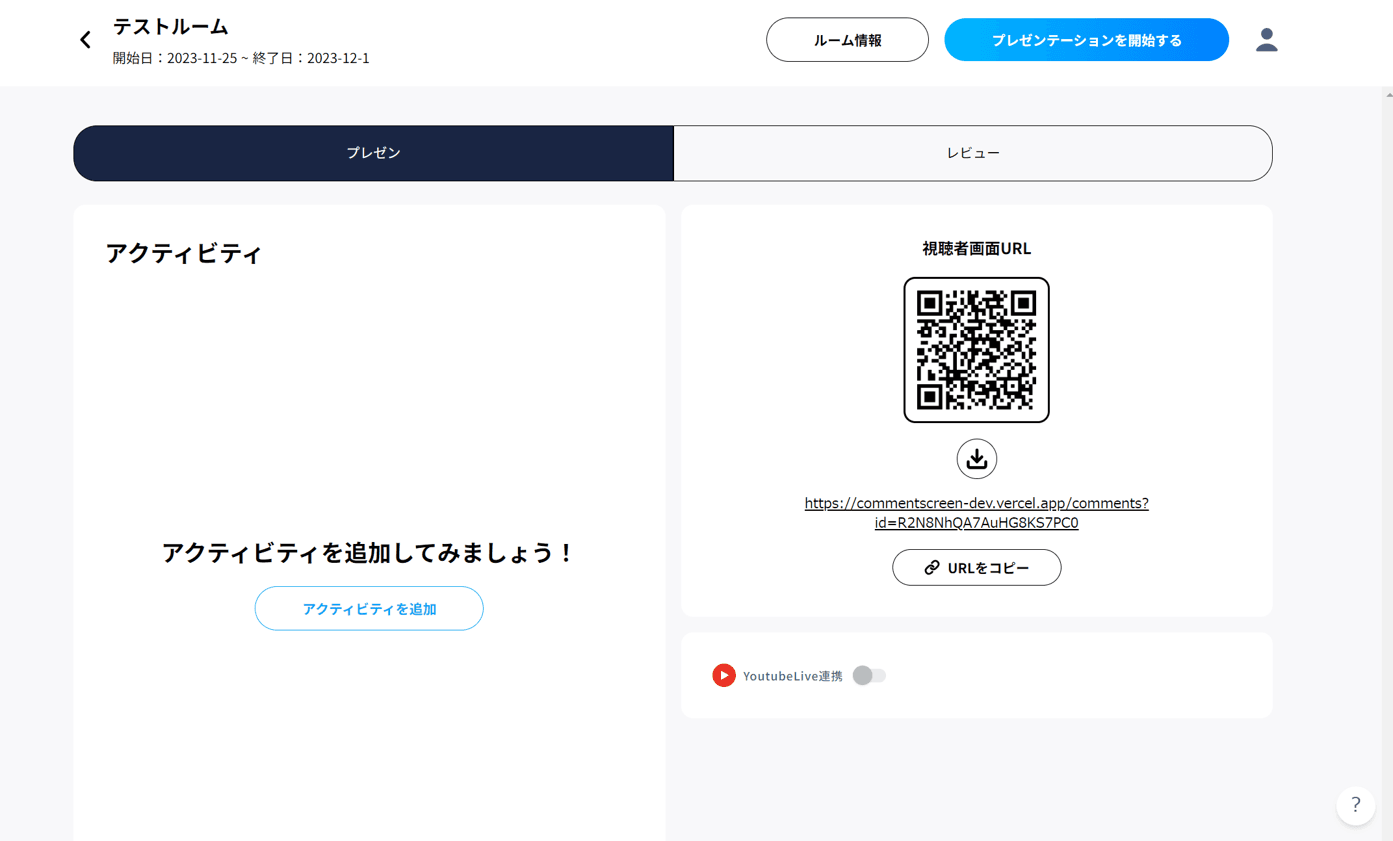
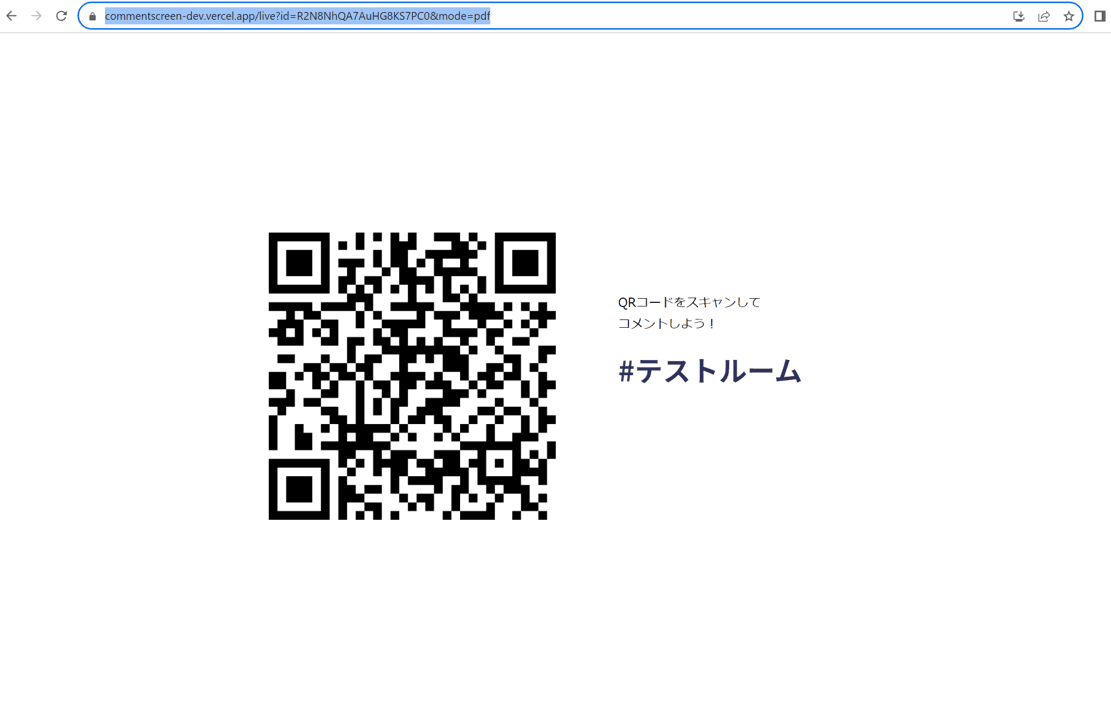
After creating the room, share the displayed QR code or URL with guests and ask them to open it on their devices.
If you set a password to make the room private, guests must enter it when joining.
Invite with a Room Name
Ask participants to open the website’s home page.
Under For participants, enter the room name in Enter event name and click Join. If the room is password-protected, participants must enter the password.

4. Start a Presentation
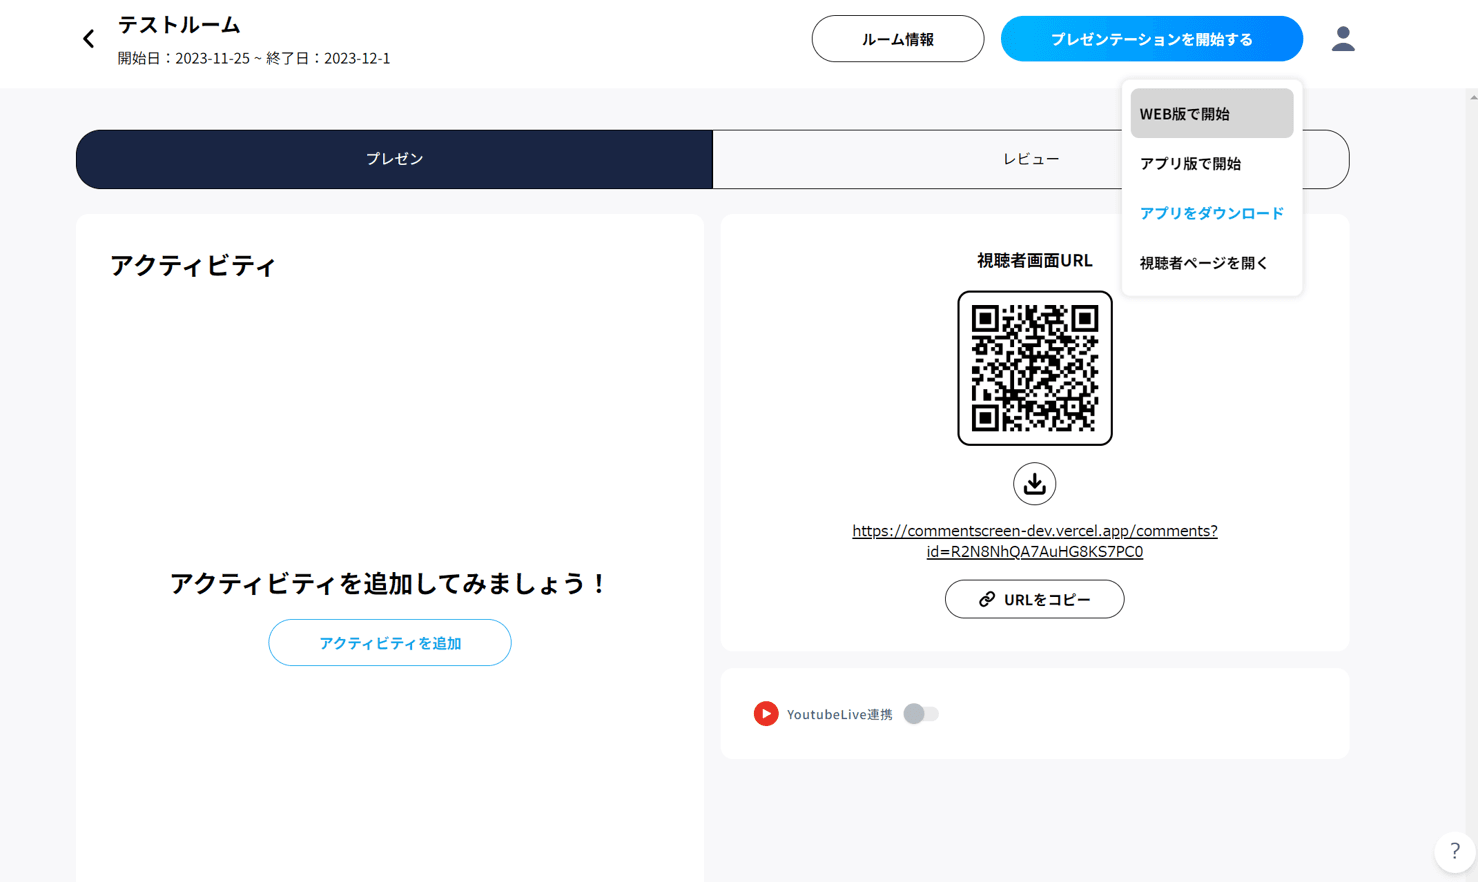
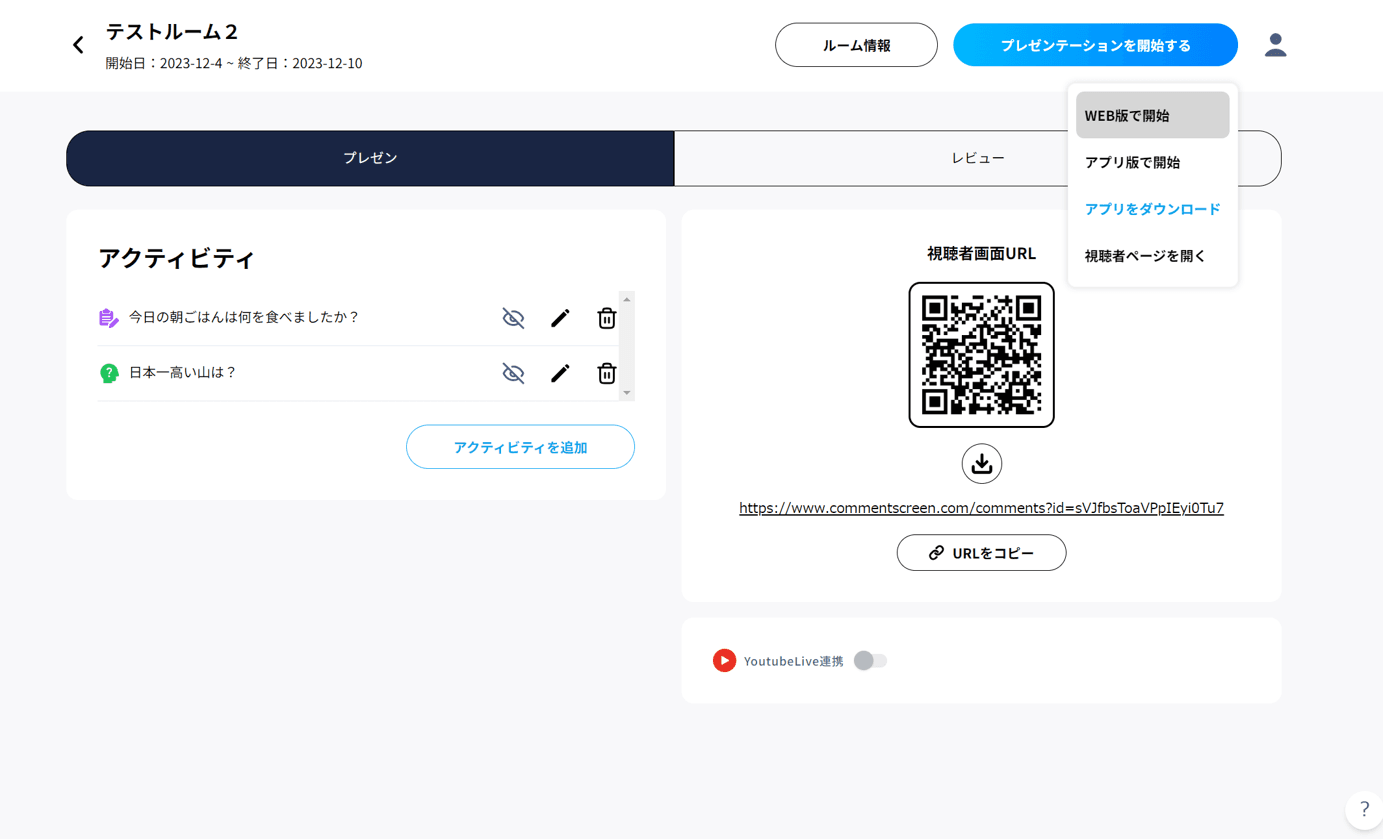
Step 1. At the top right, select Start presentation, then Start with the web version to open the Web LIVE page.
Step 2. Click Select PDF file and load the file you want to present.
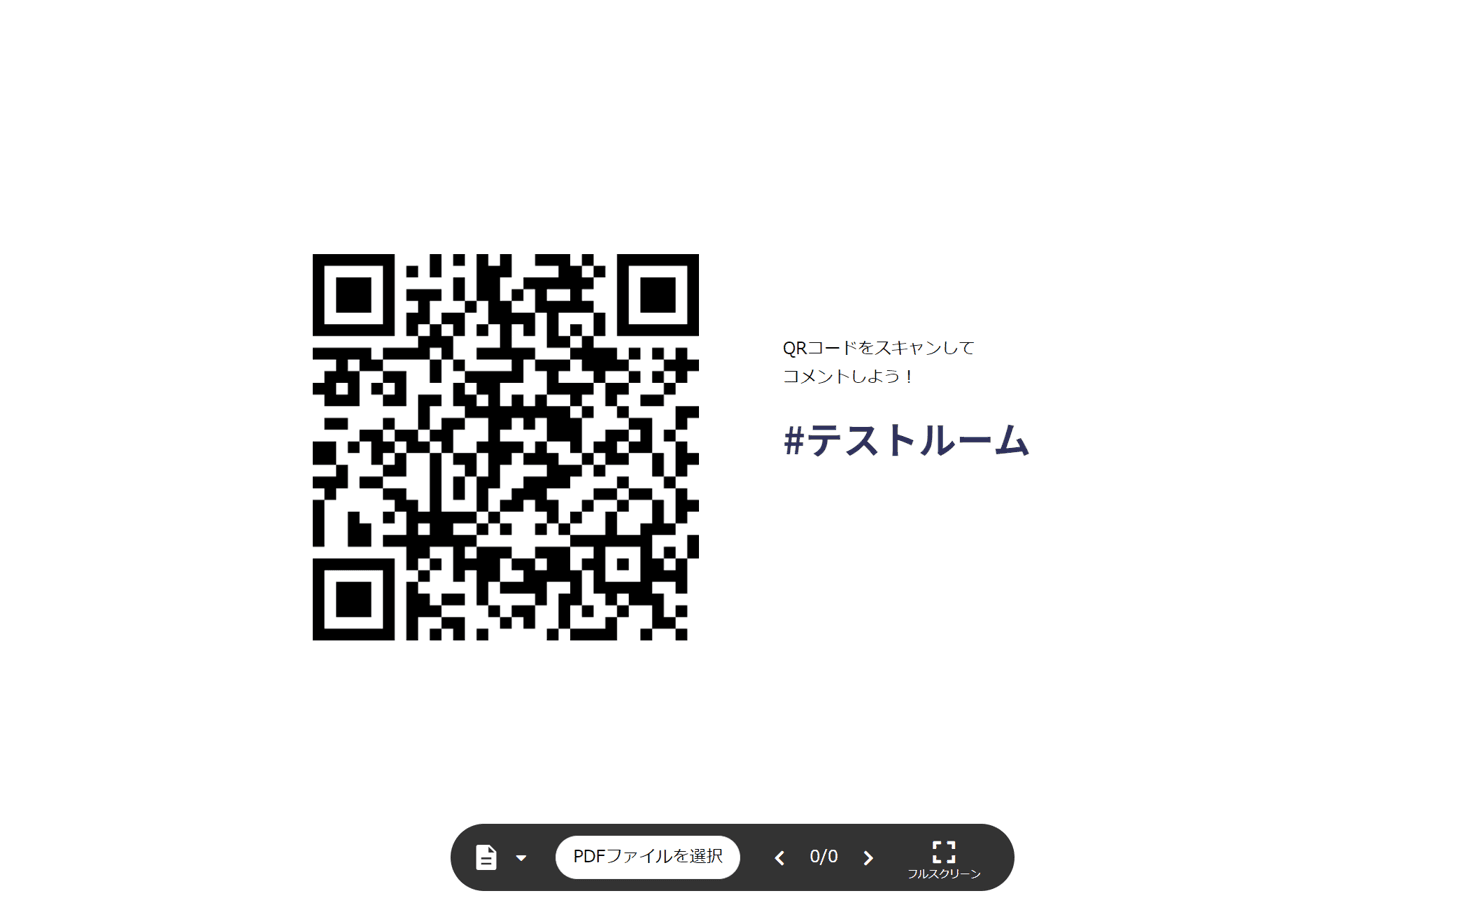
Step 3. Comments appear only on the Web LIVE page.
They will not be shown if you switch tabs or close the browser.
The PDF is used only for display and is never uploaded to the server.

5. Work with Multiple Organizers
The room creator shares the Web LIVE page URL with all other organizers.
After they open the shared URL, participant comments and emoji appear on the co-organizers’ screens too.
The PDF currently being displayed is not shared.
Organizers other than the room creator can join as organizers without creating an account.
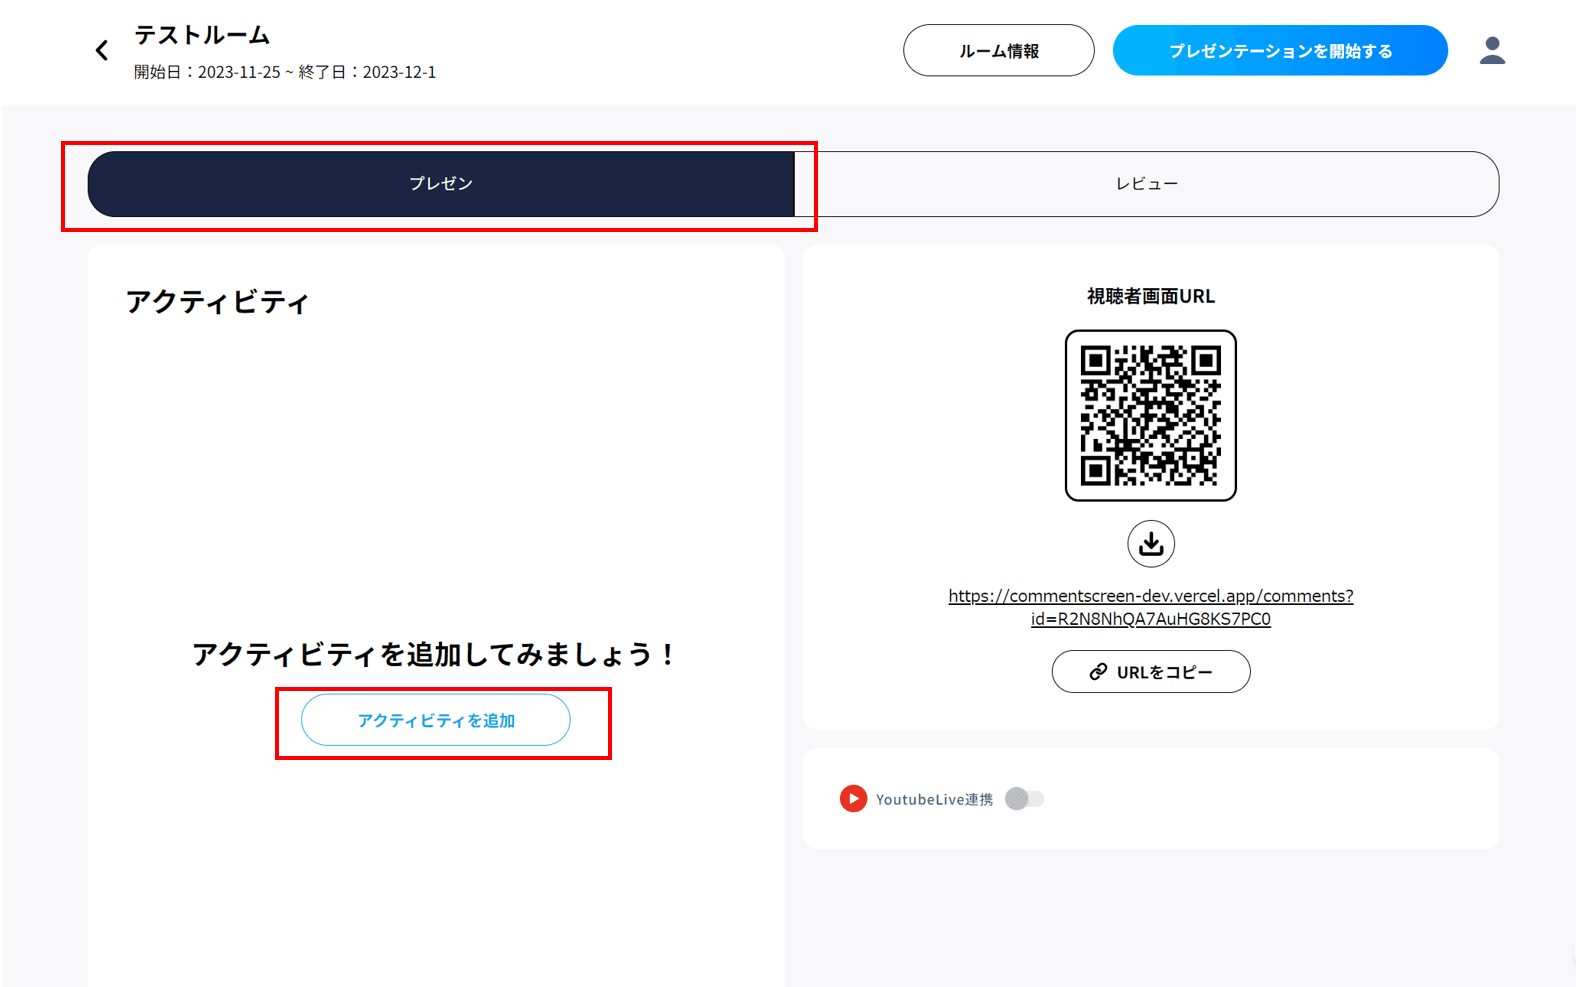
6. Create and Run a Poll
Step 1. Open the dashboard and select the room.
Open the Presentation tab and click Add activity.
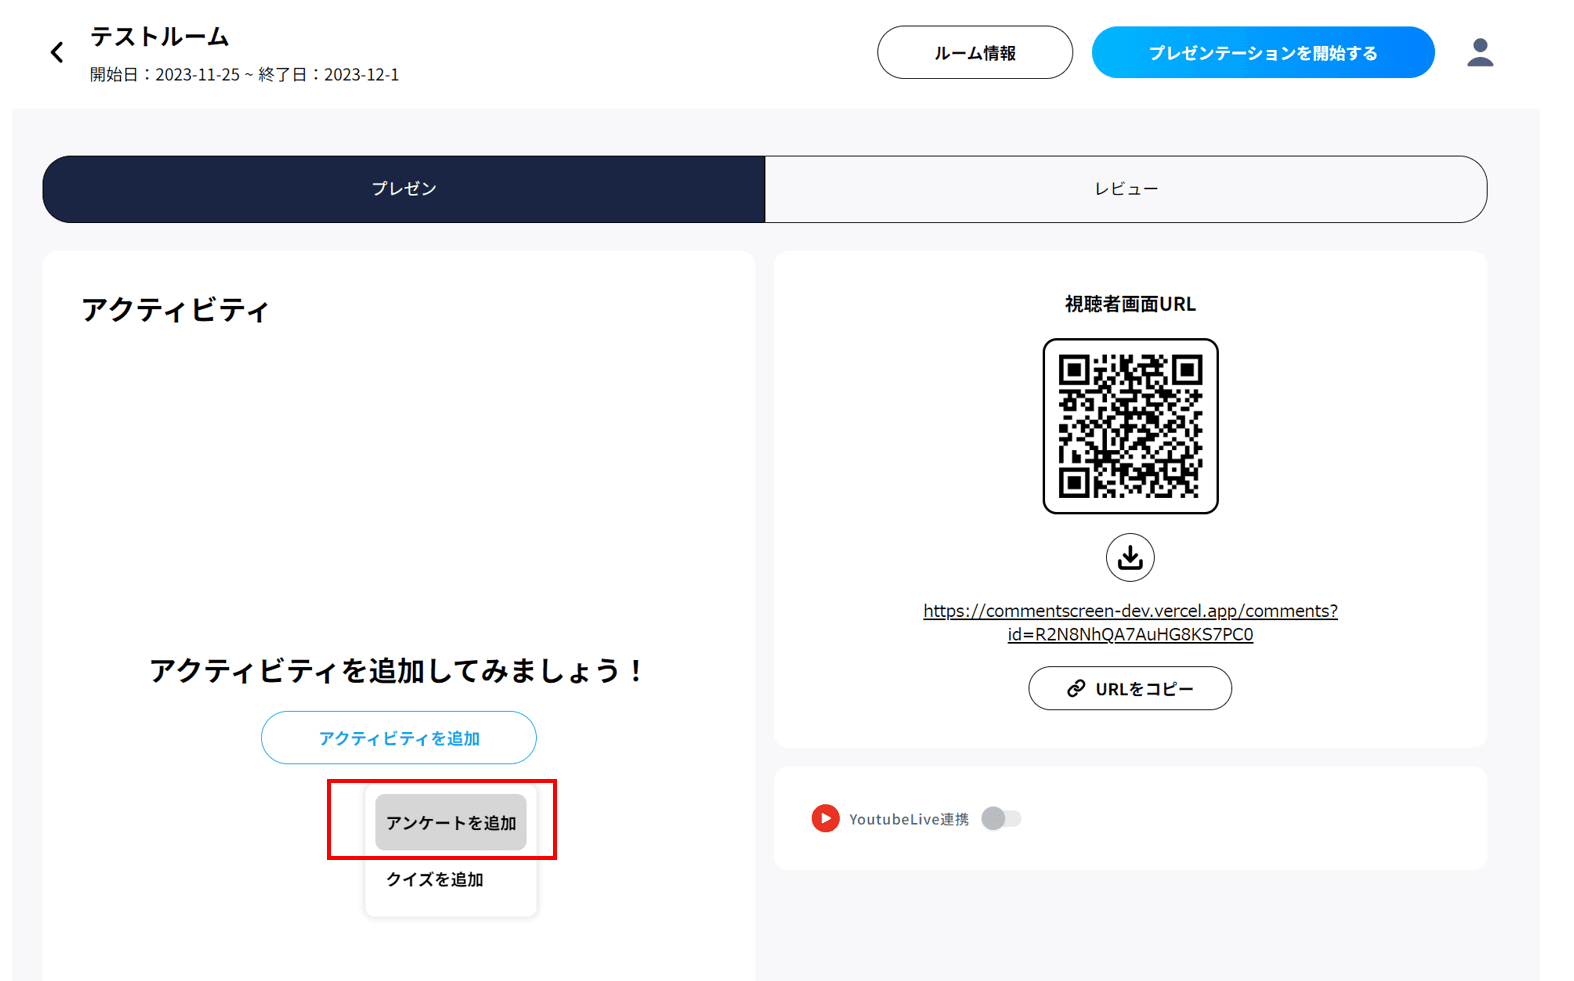
Step 2. Select Add poll.
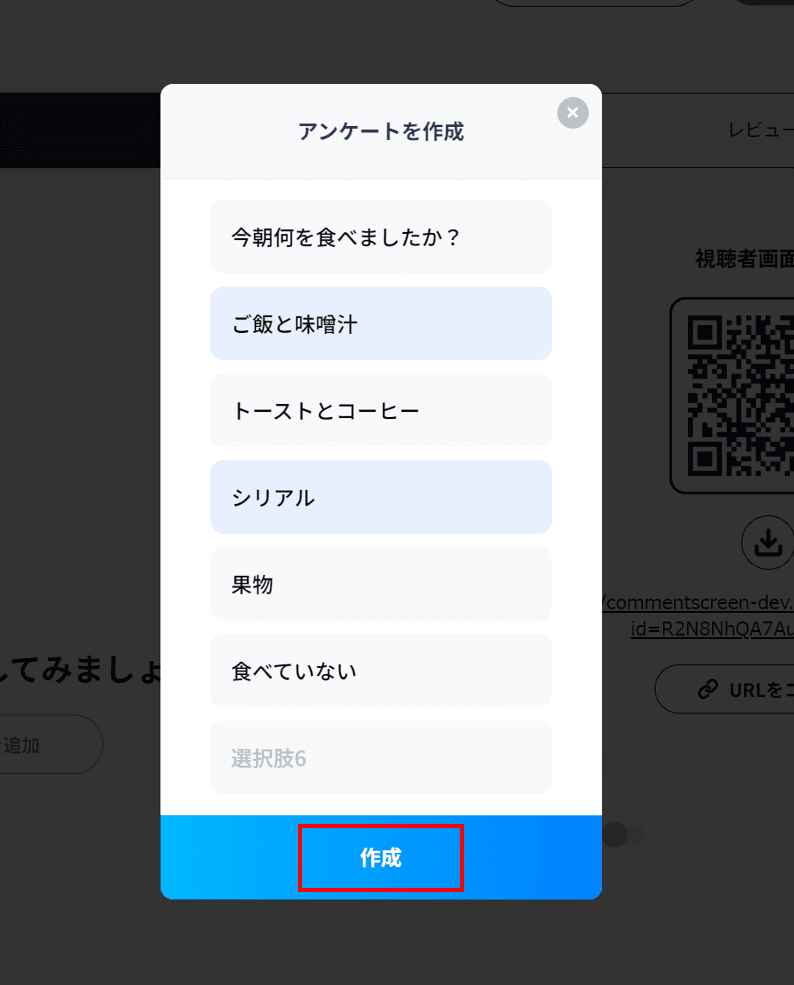
Step 3. Enter the question and answer options, then click Create.
Step 4. The poll is ready when its details appear.
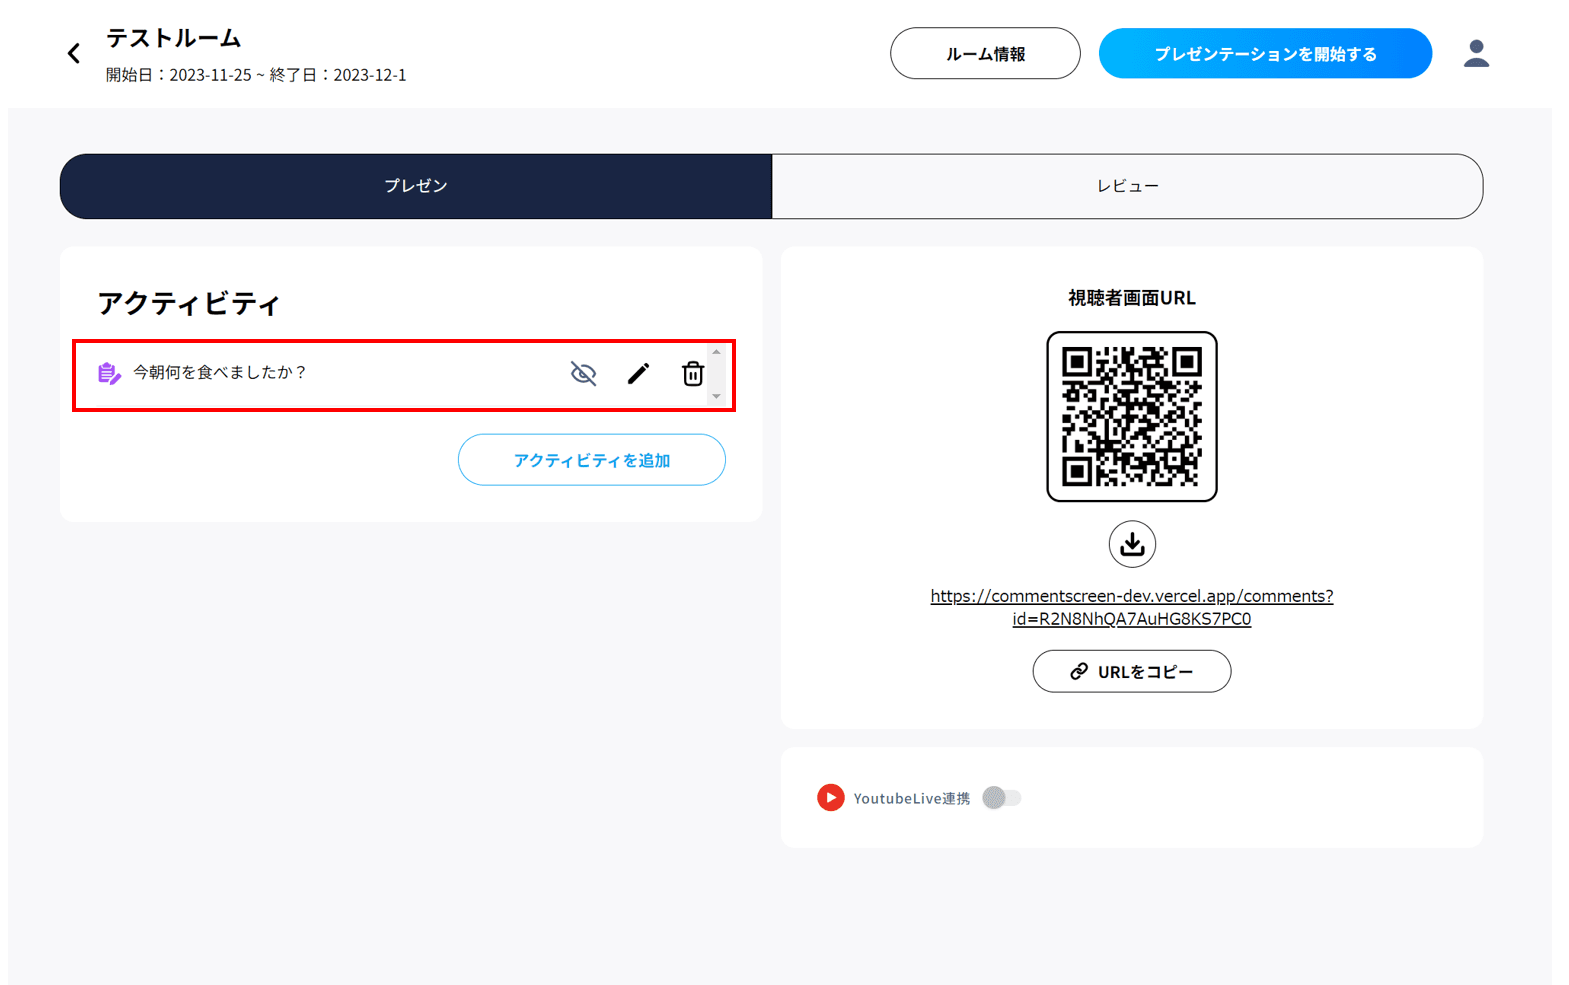
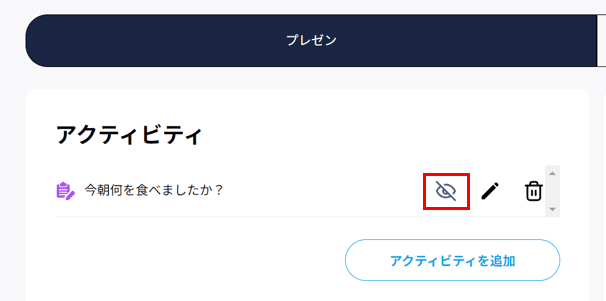
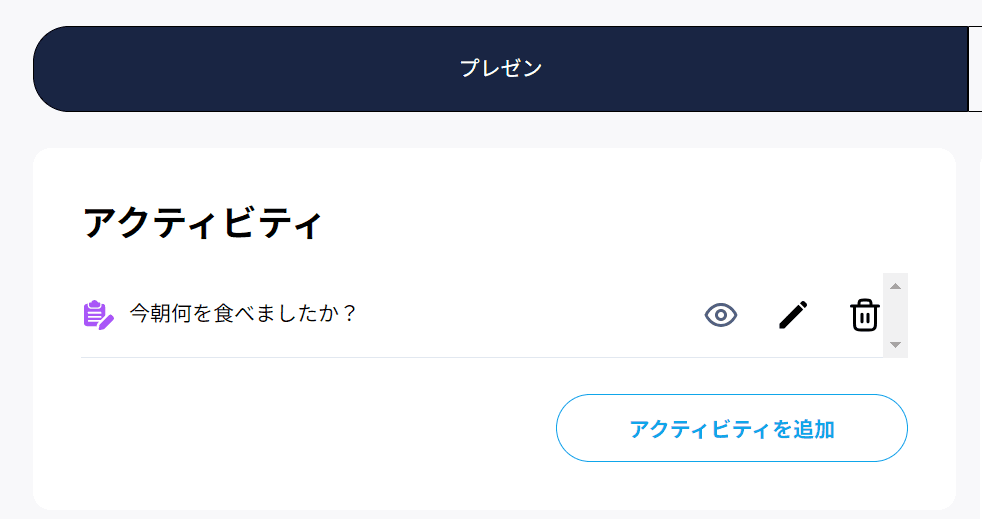
Step 5. A new poll is hidden automatically and does not appear on participants’ screens.
Click the closed-eye icon to open it and show the poll to participants.
Step 6. Under Start presentation, select Start with the web version.
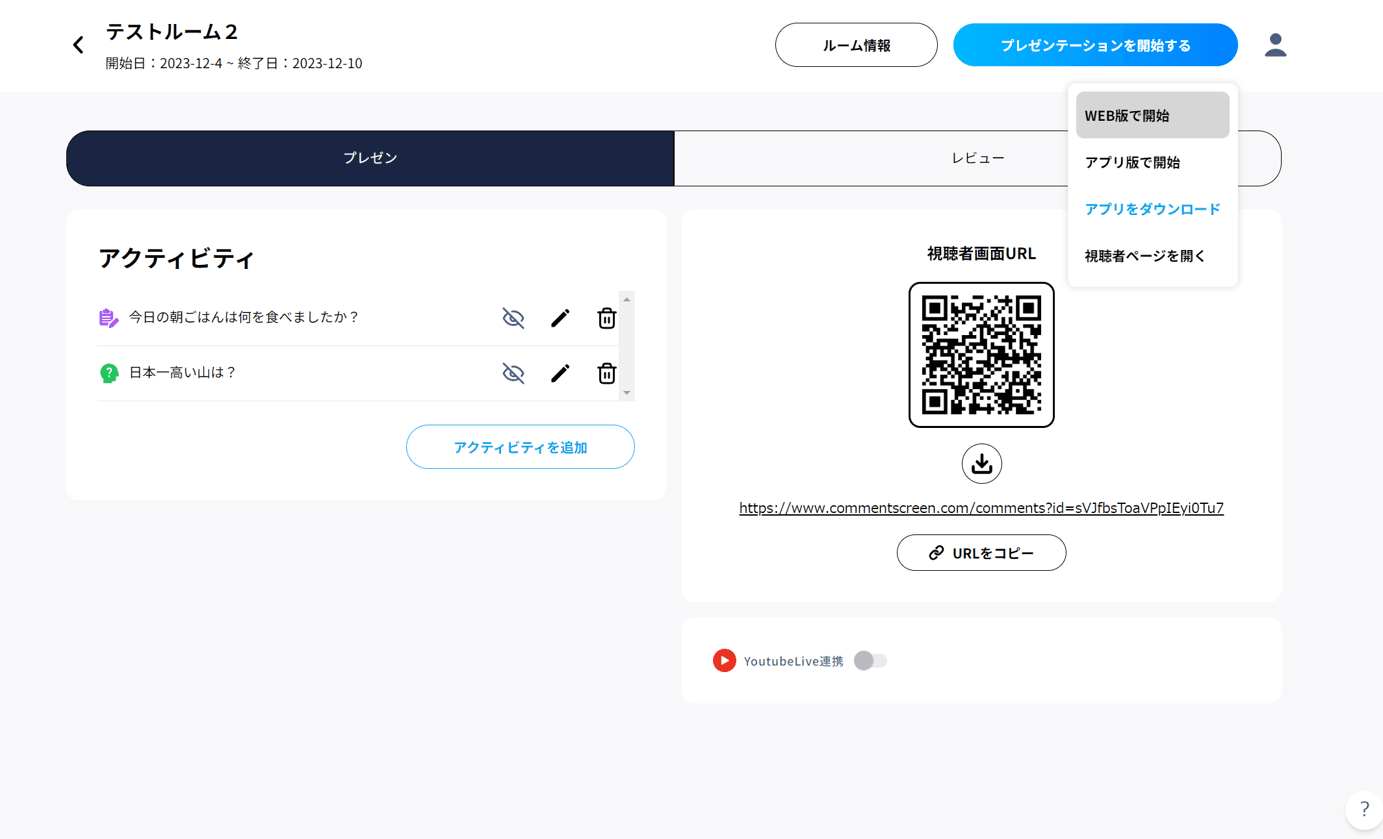
Step 7. Click the note-shaped icon and select the poll question you created.
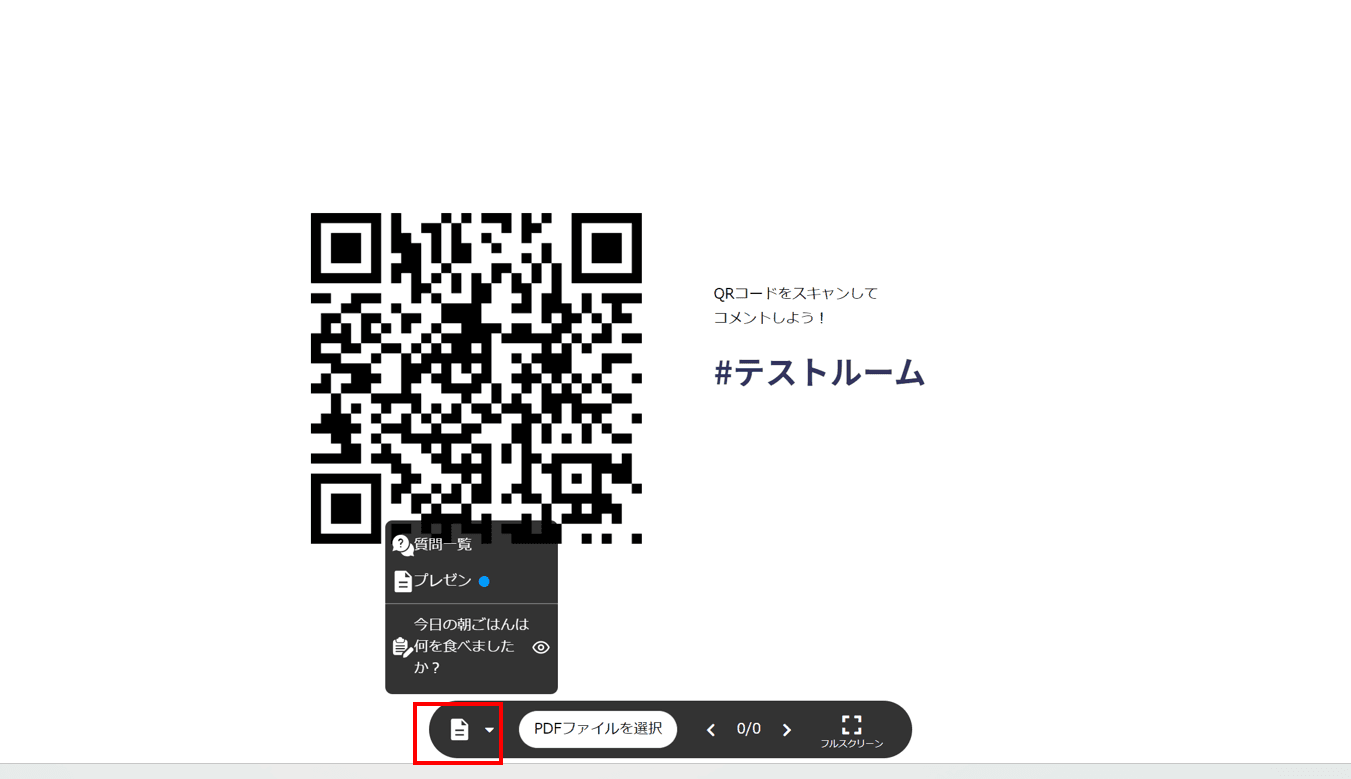
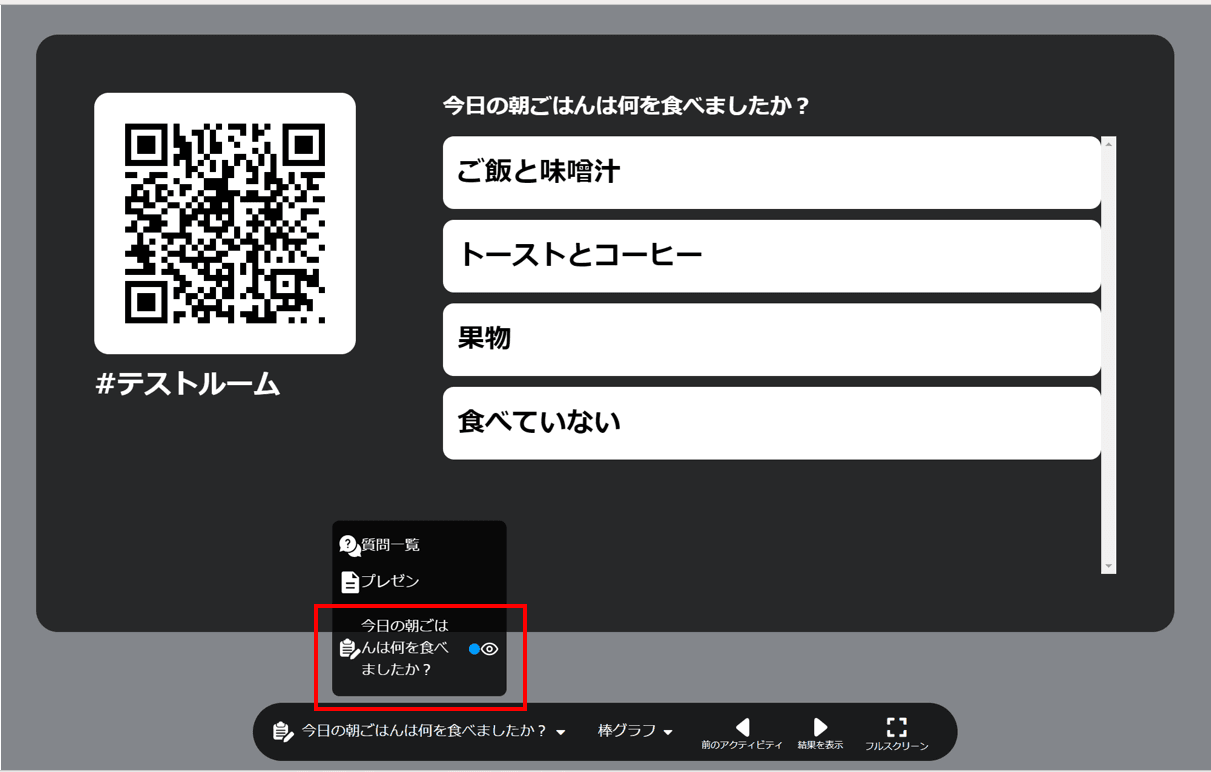
Step 8. Click Show results.
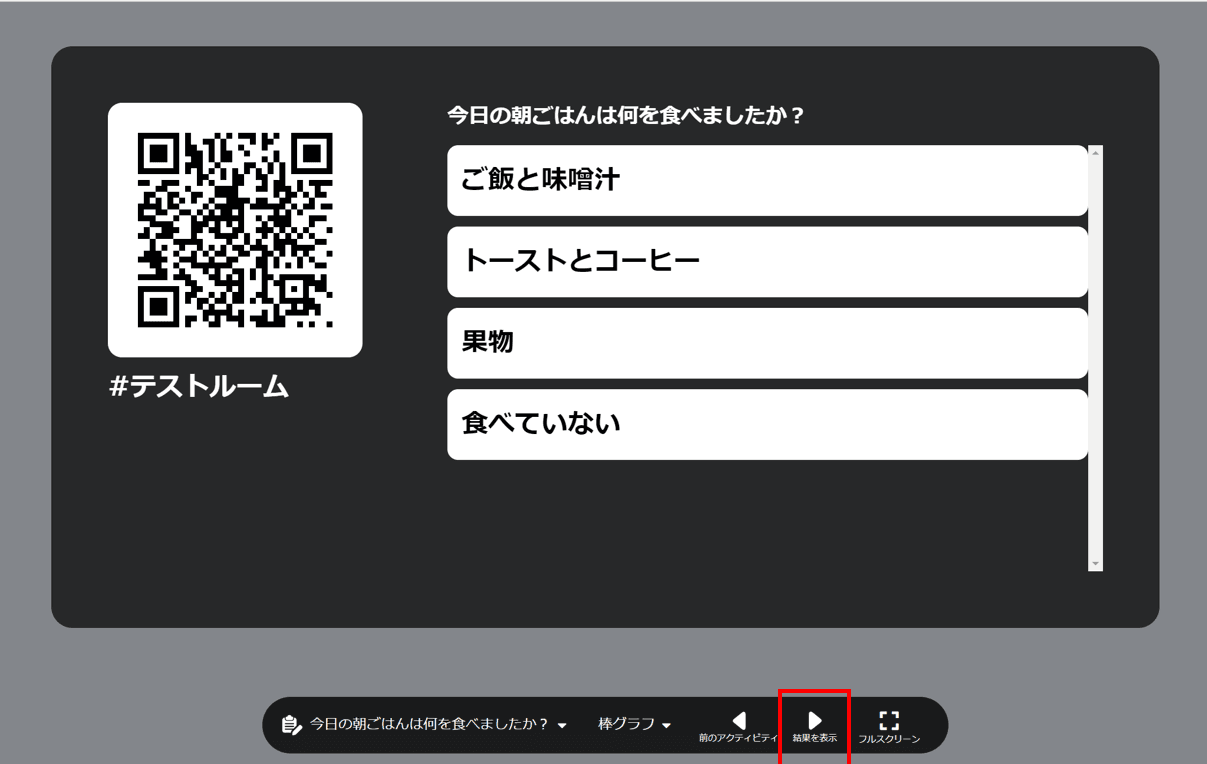
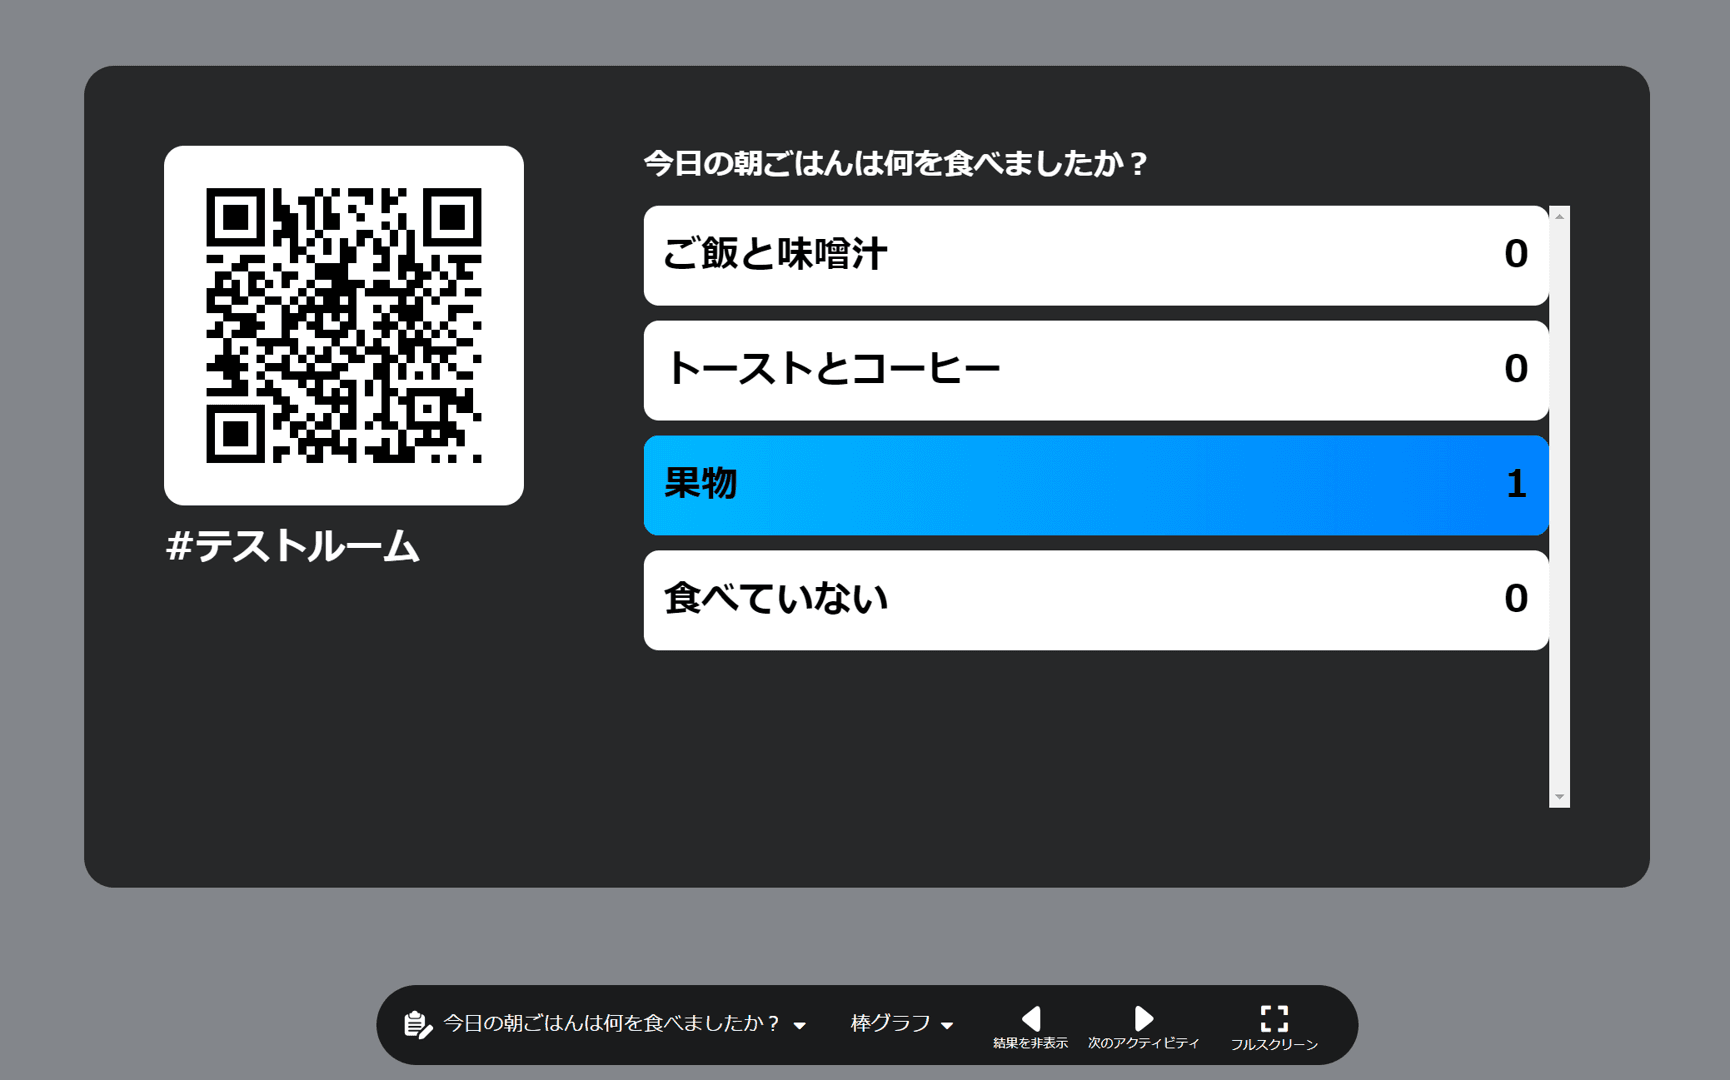
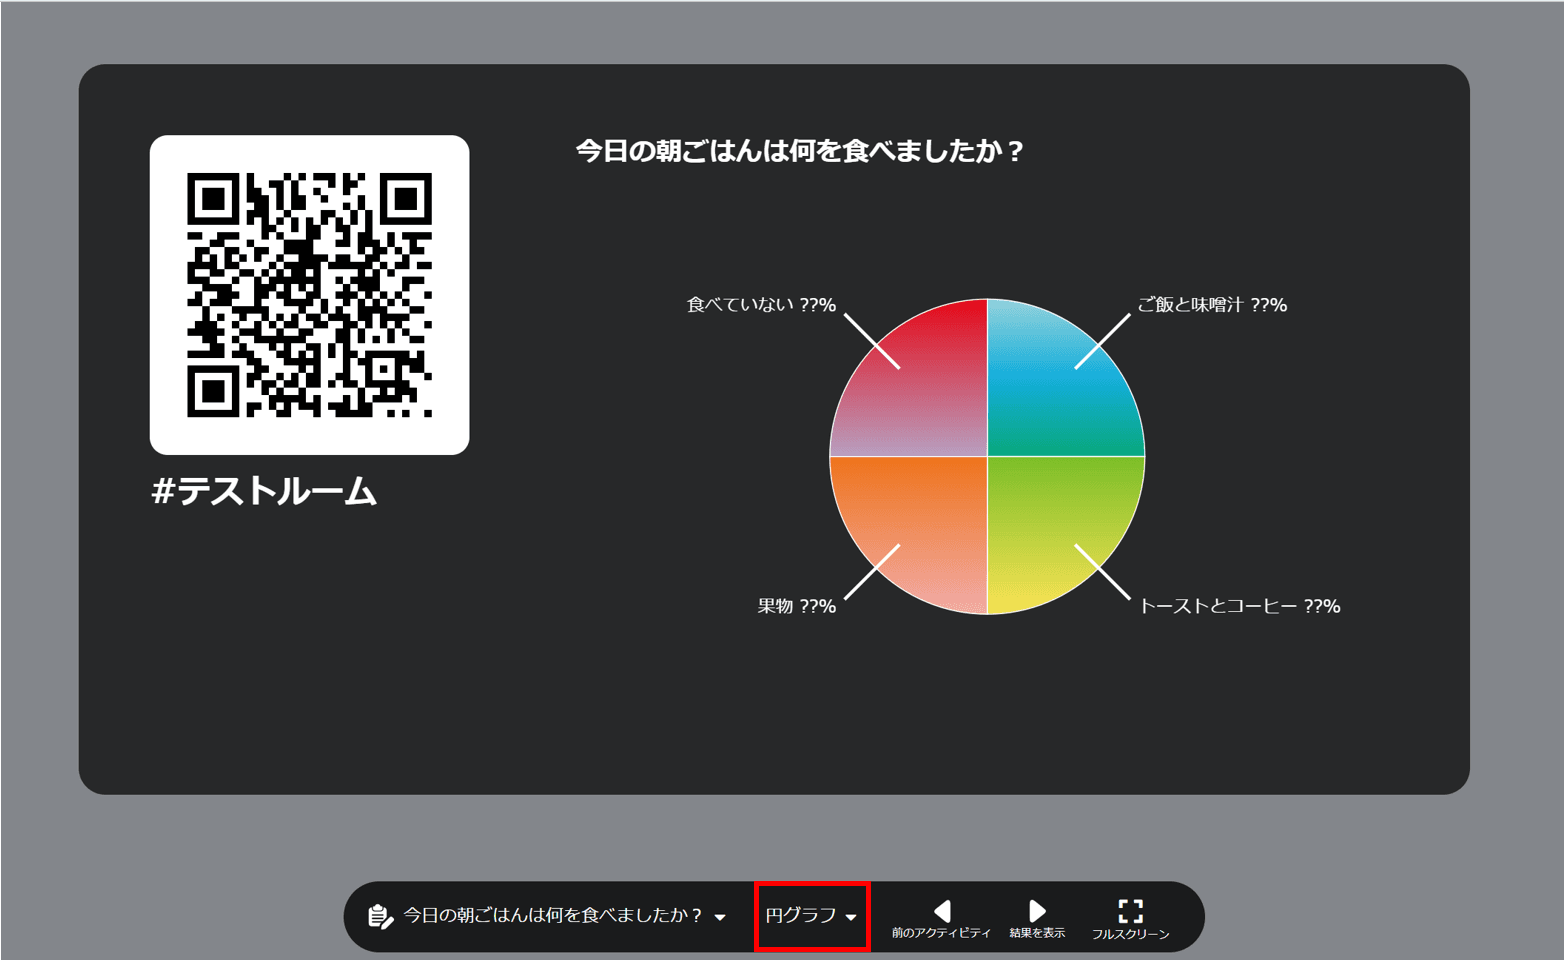
Step 9. Choose either a Bar chart or Pie chart.
The bar chart shows the number of responses; the pie chart shows response percentages.
7. Create and Run a Quiz
Step 1. Open the dashboard and select the room.
Open the Presentation tab and click Add activity.
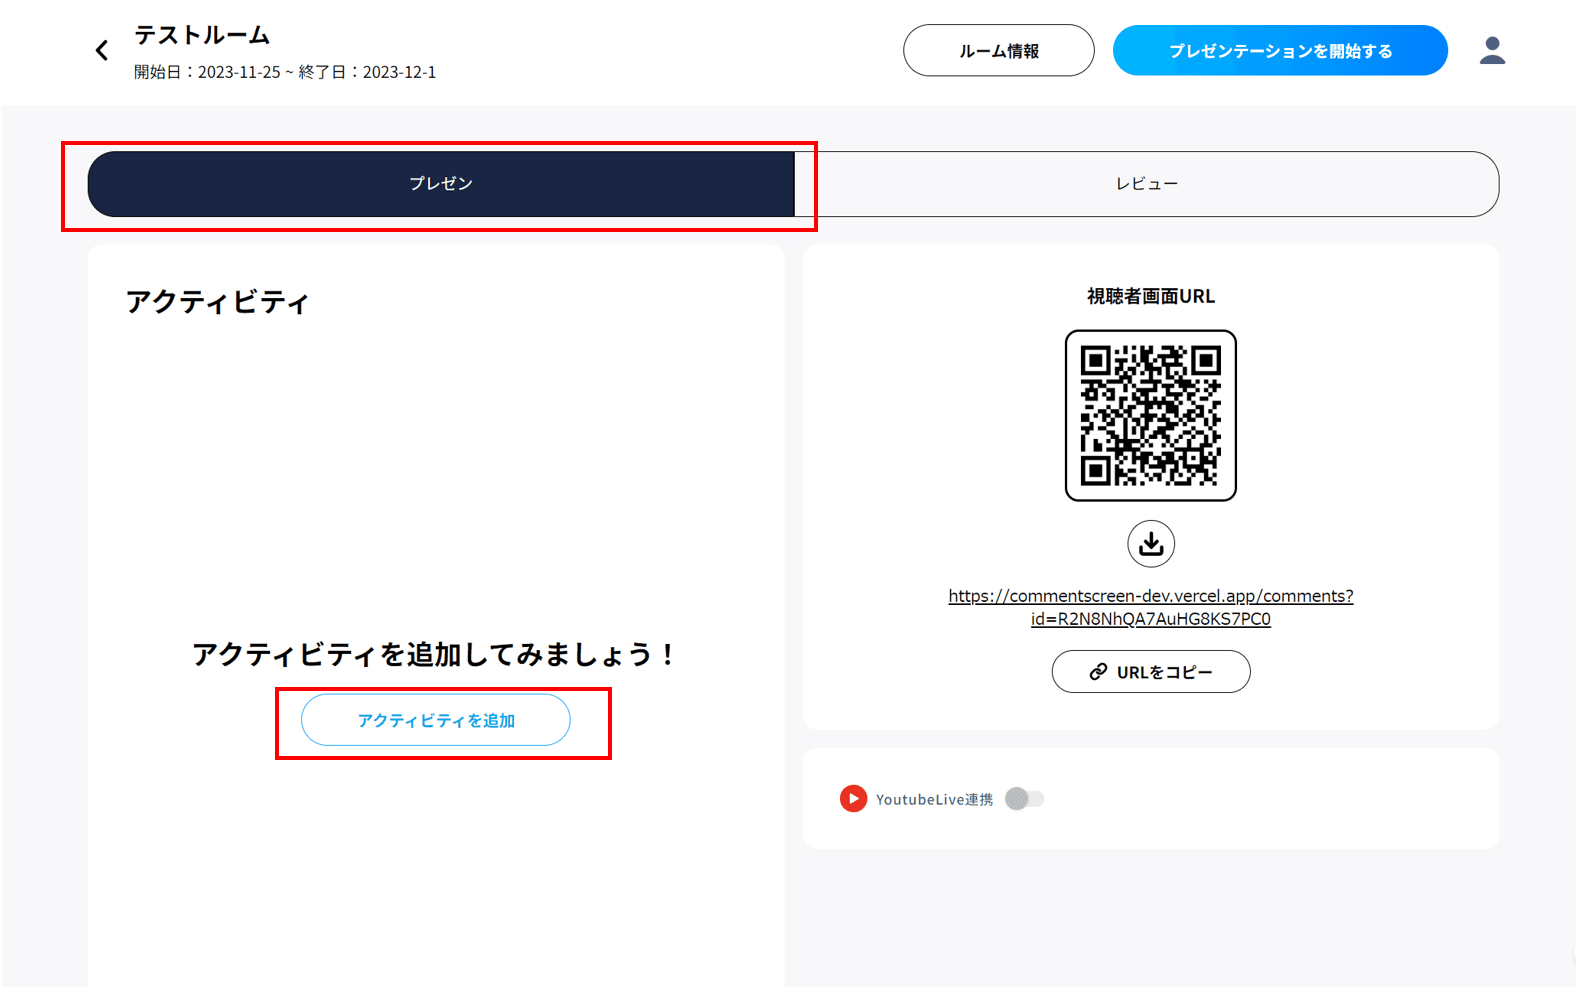
Step 2. Select Add quiz.
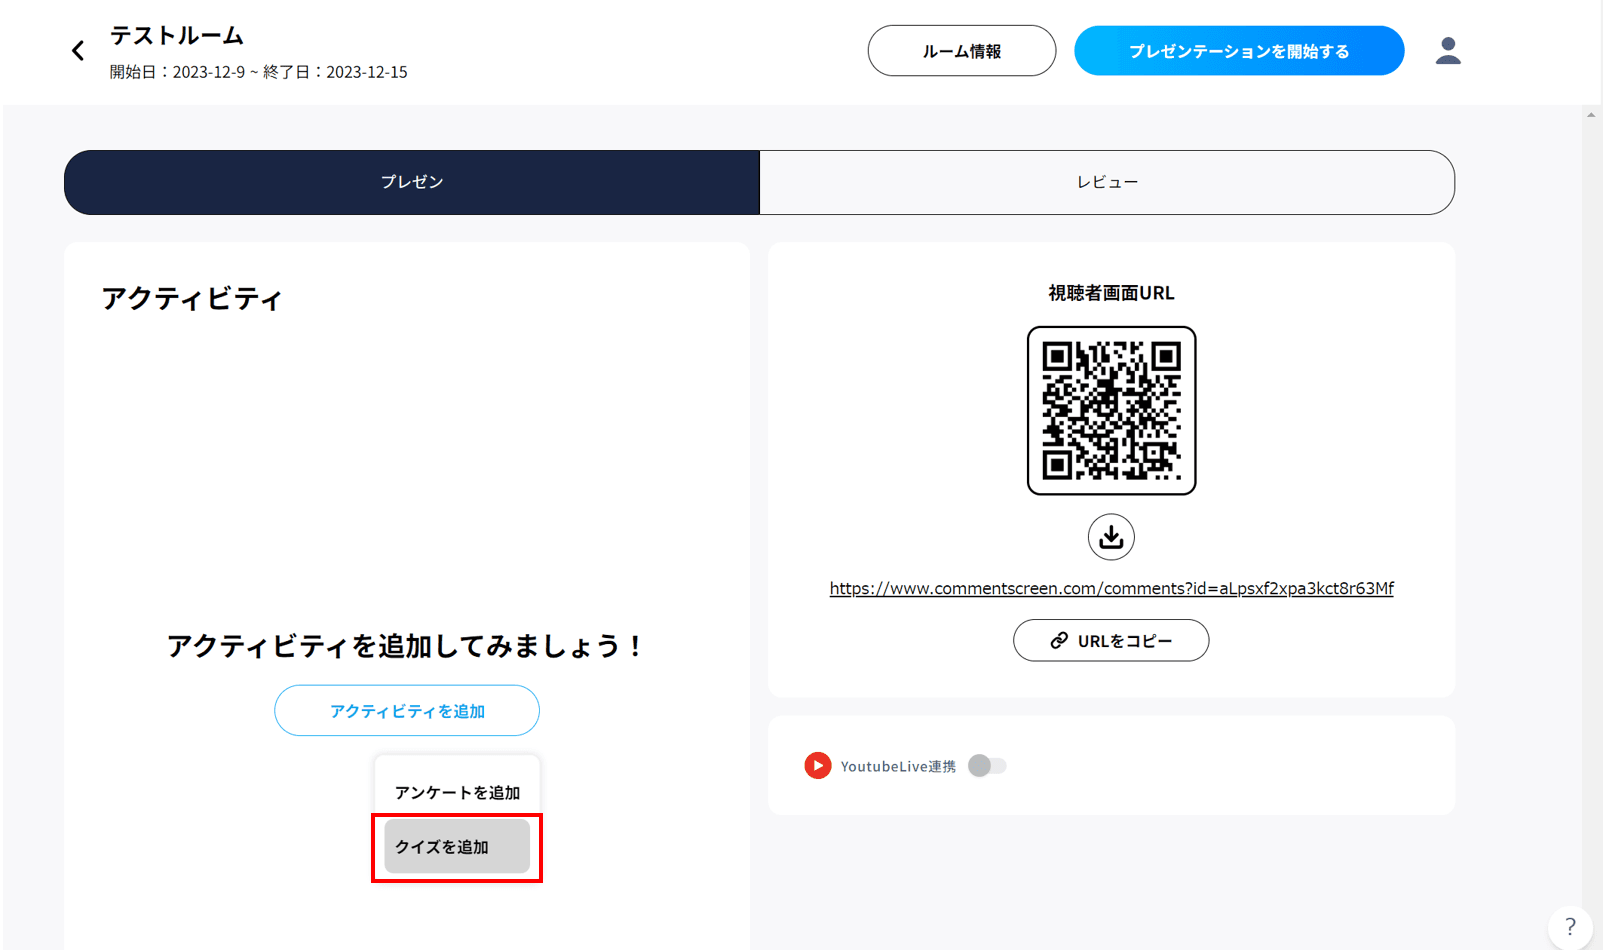
Step 3. Enter the quiz question and answer options, then click Create.
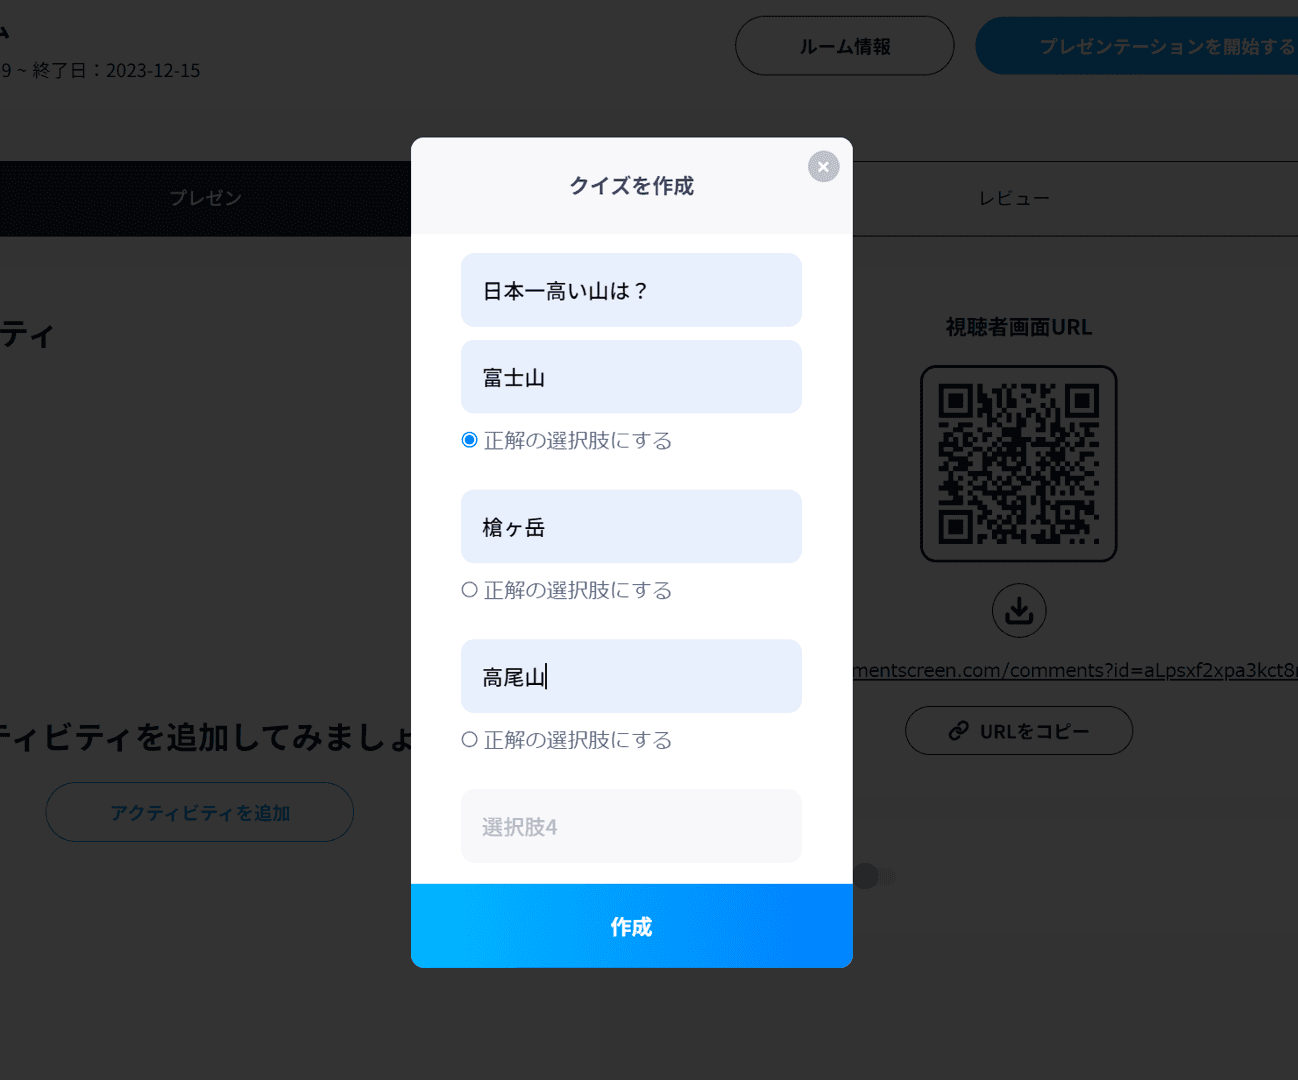
Step 4. The quiz is ready when its details appear.
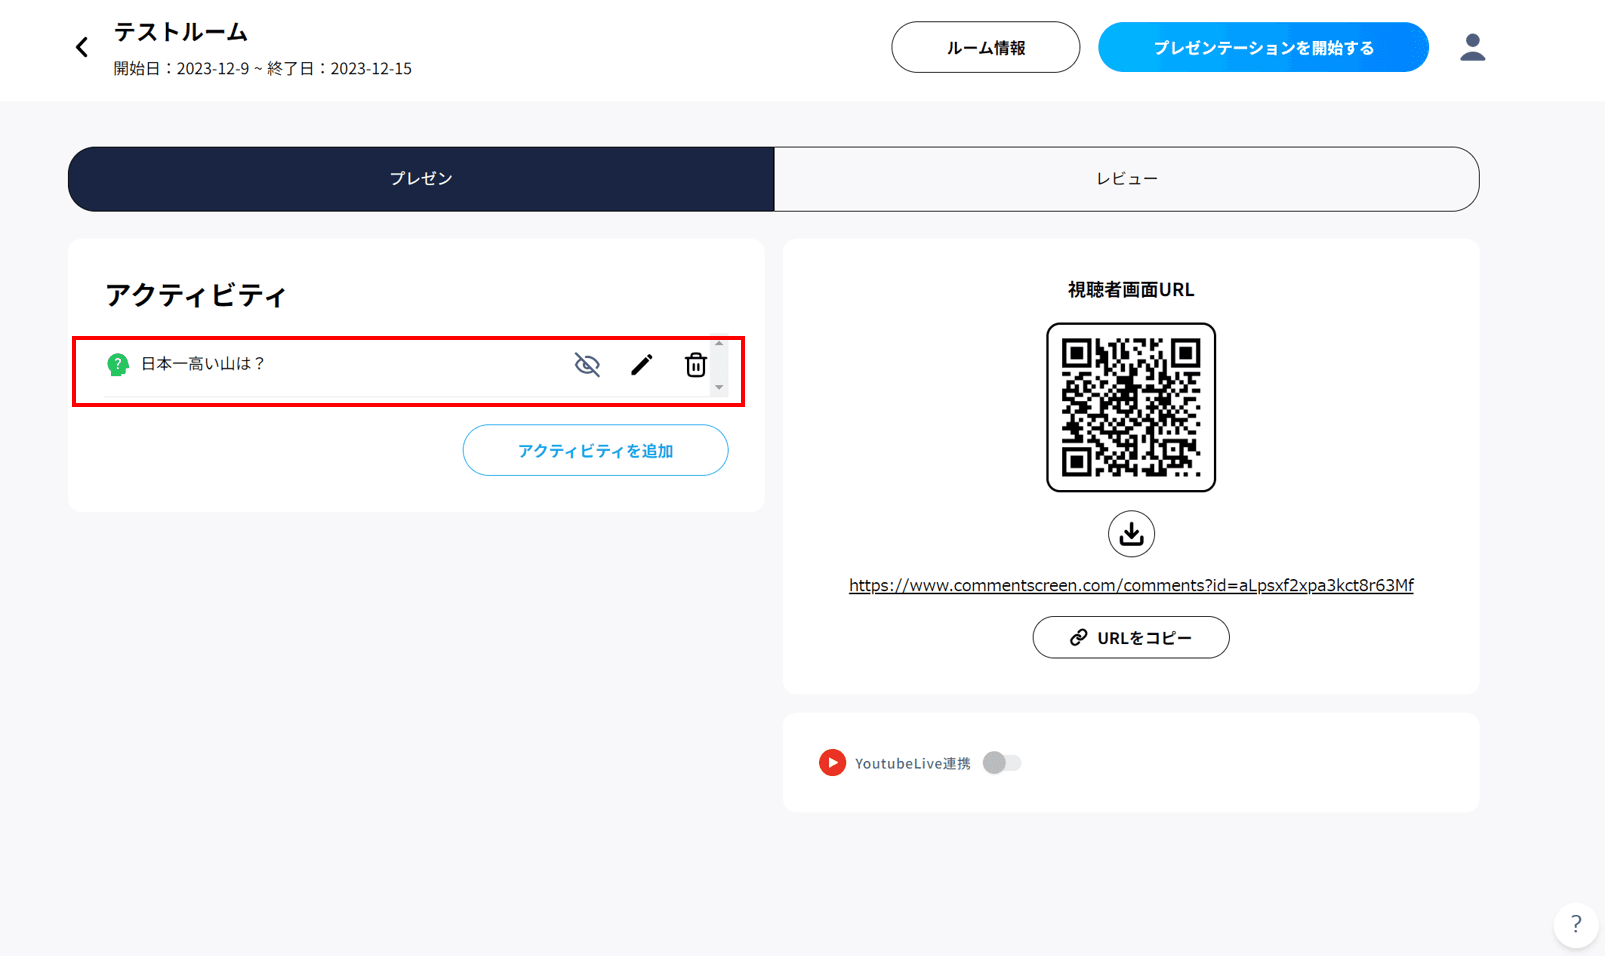
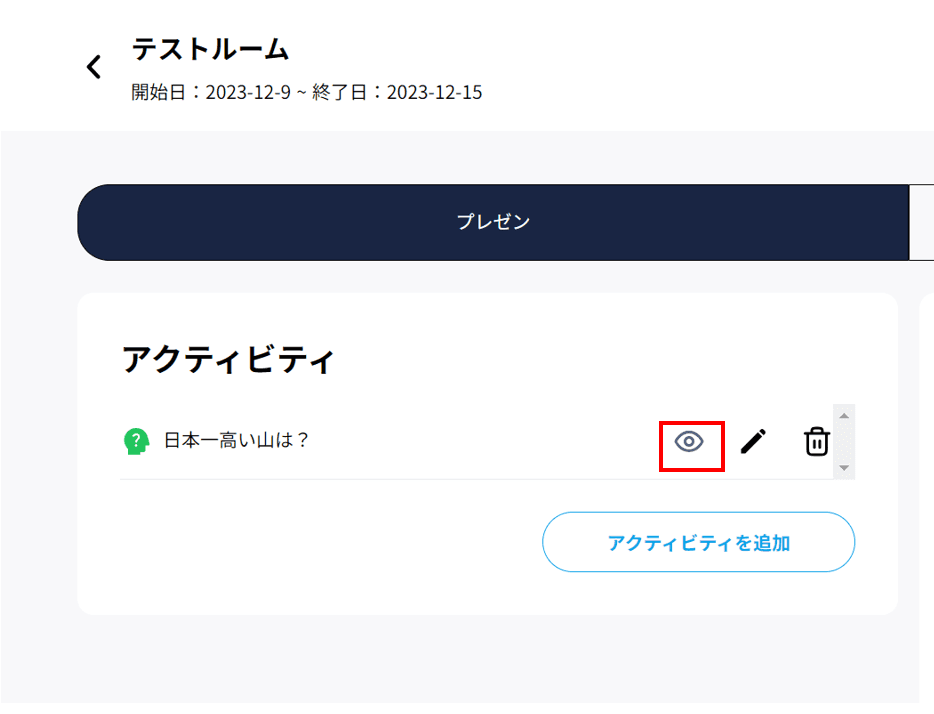
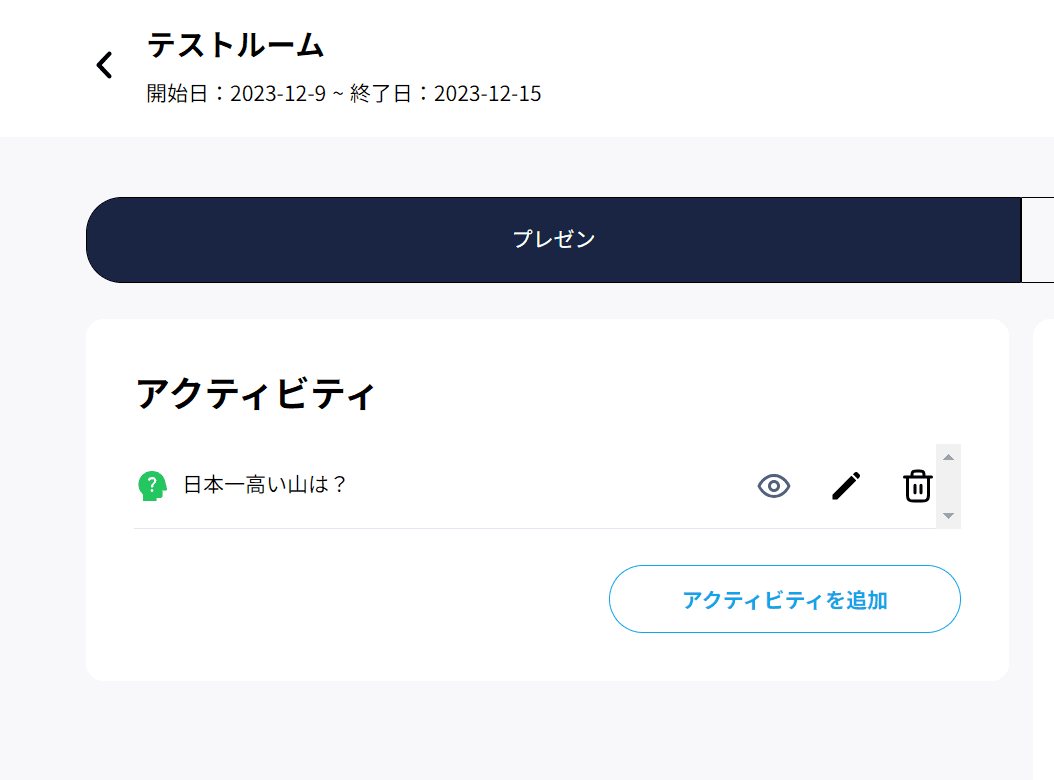
Step 5. A new quiz is hidden automatically and does not appear on participants’ screens.
Click the closed-eye icon to open it and show the quiz to participants.
Step 6. Under Start presentation, select Start with the web version.
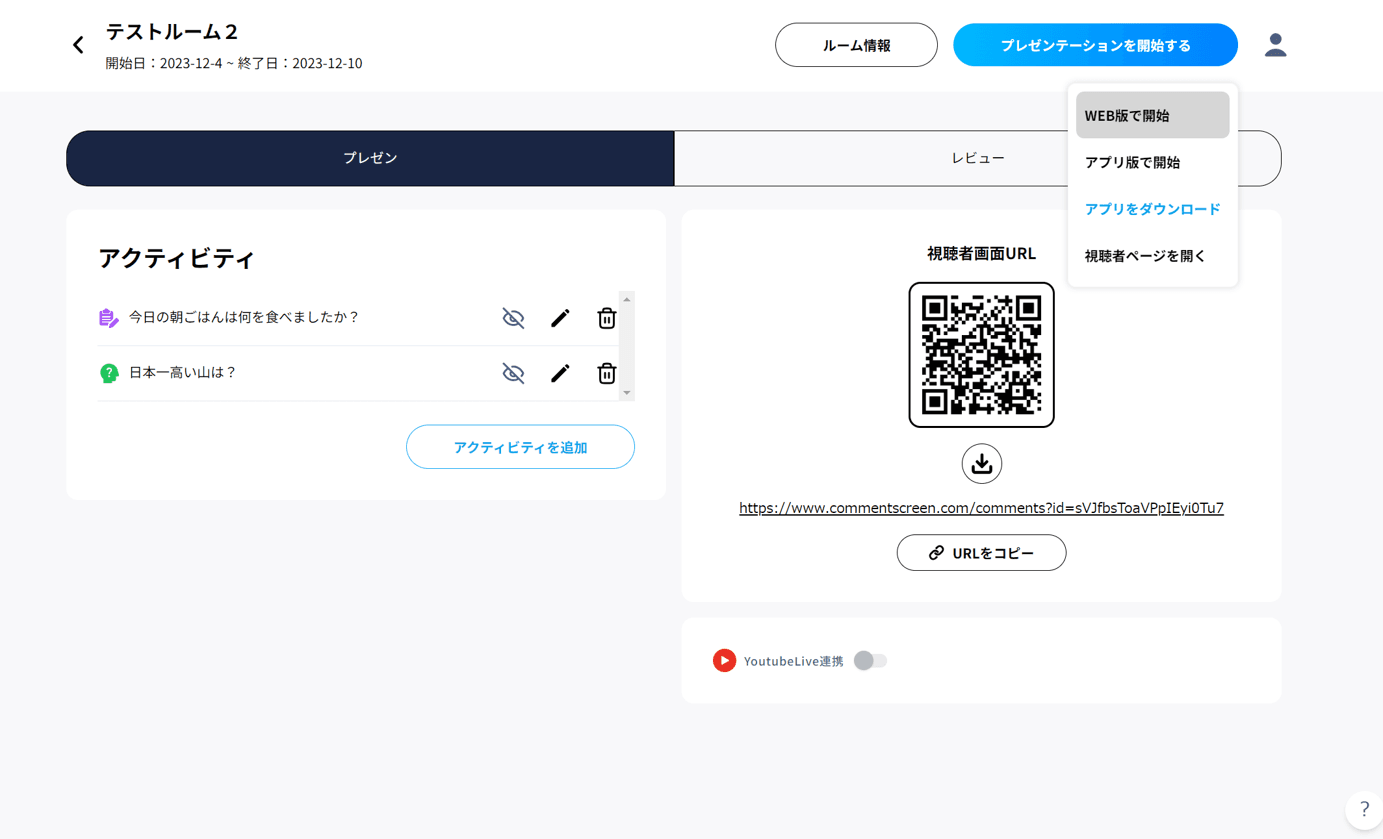
Step 7. Click the note-shaped icon and select the quiz question you created.
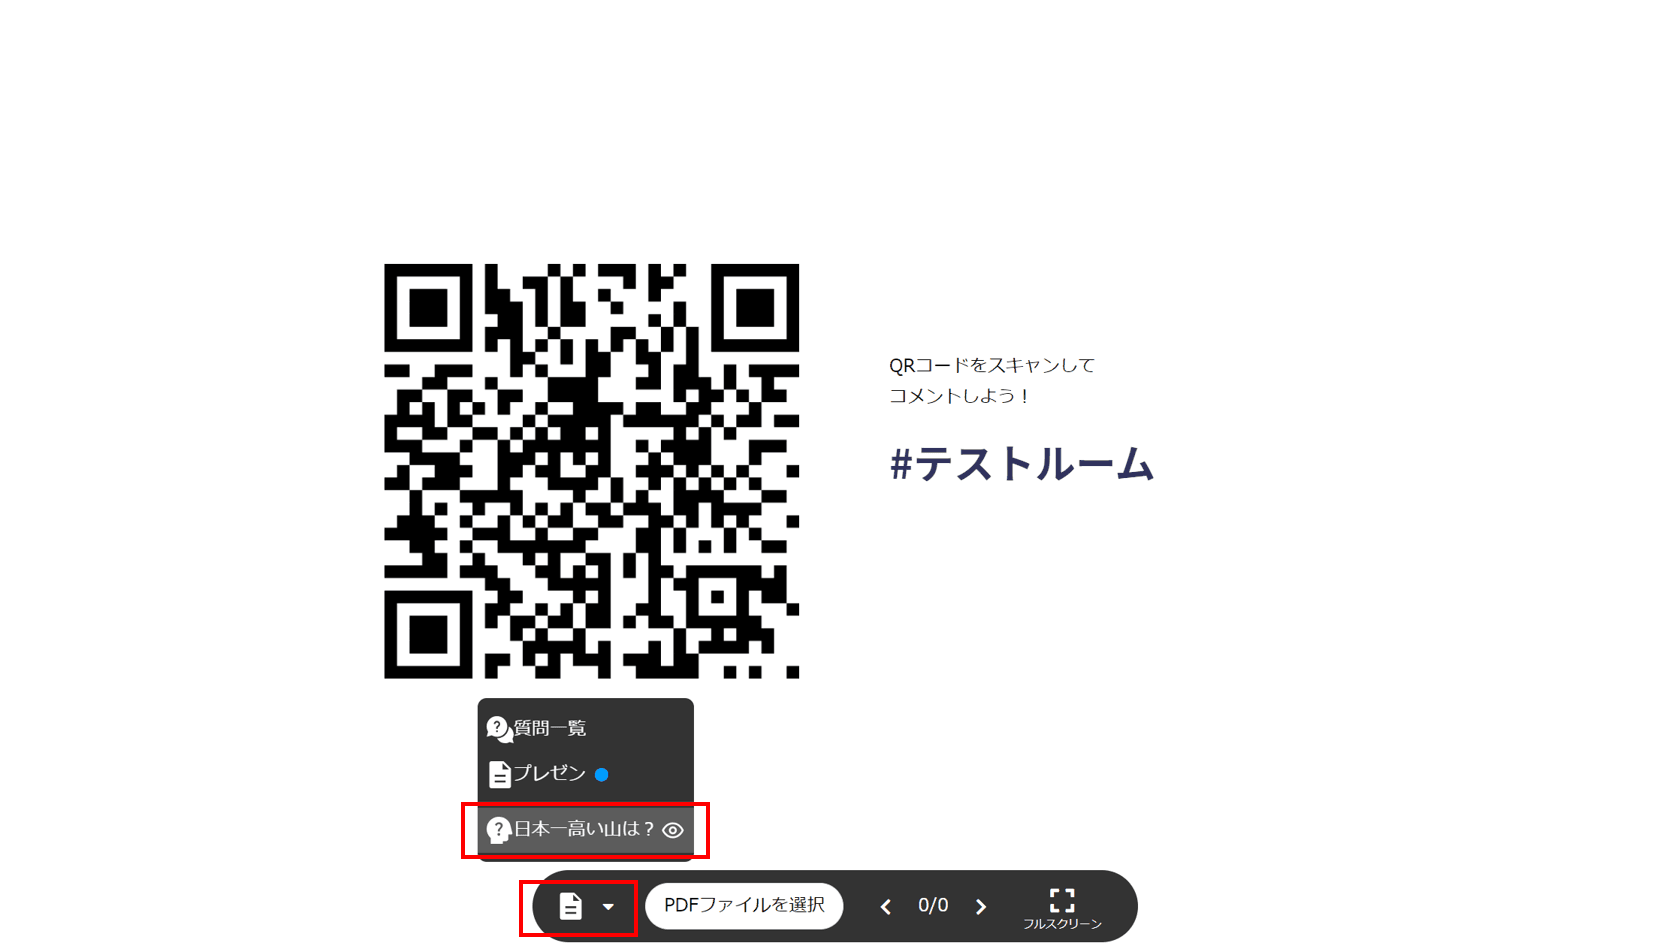
Step 8. Click Show results.
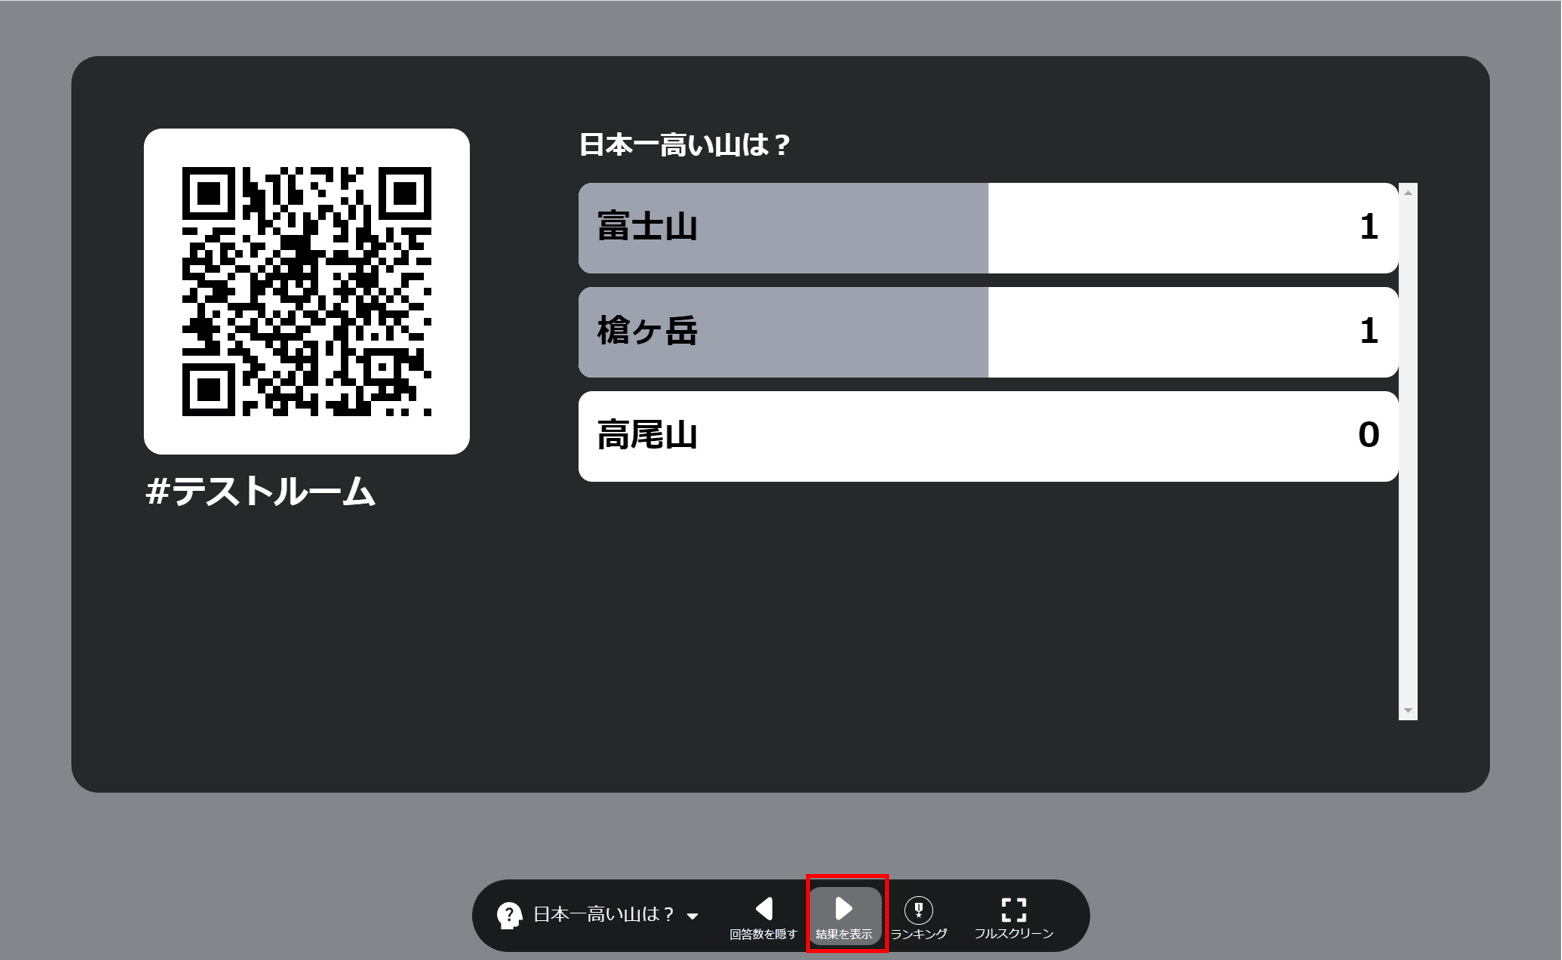
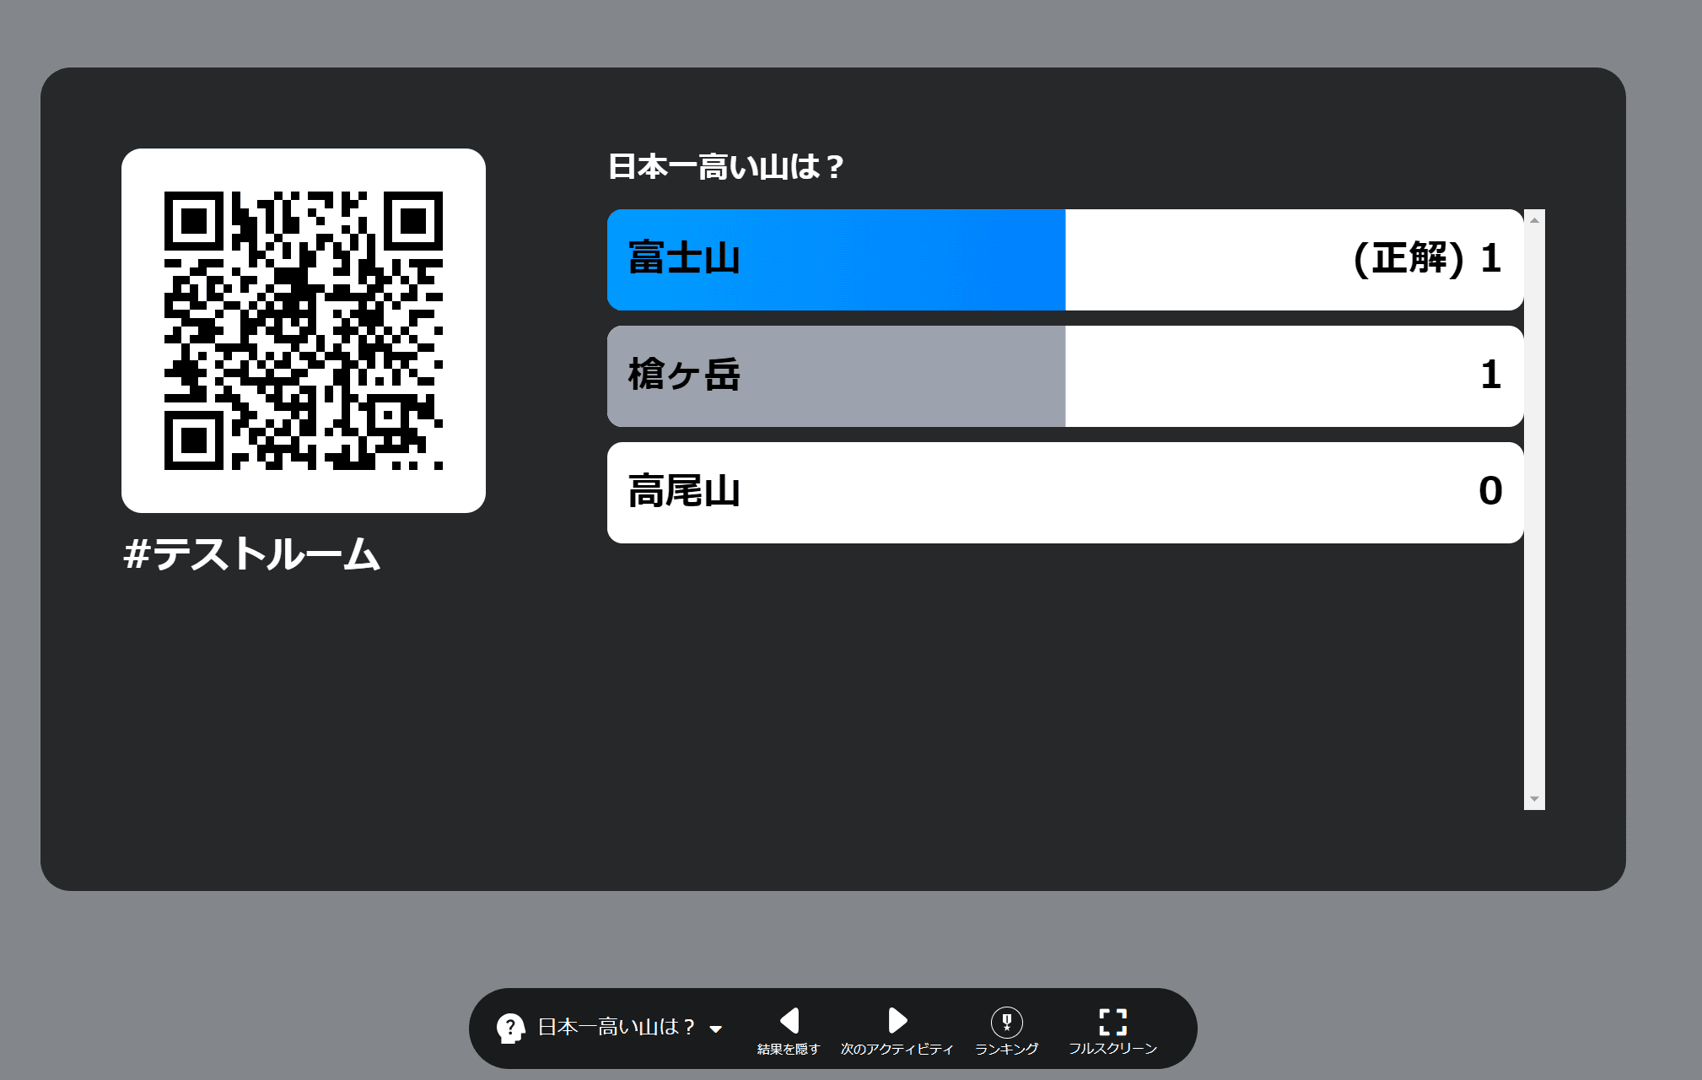
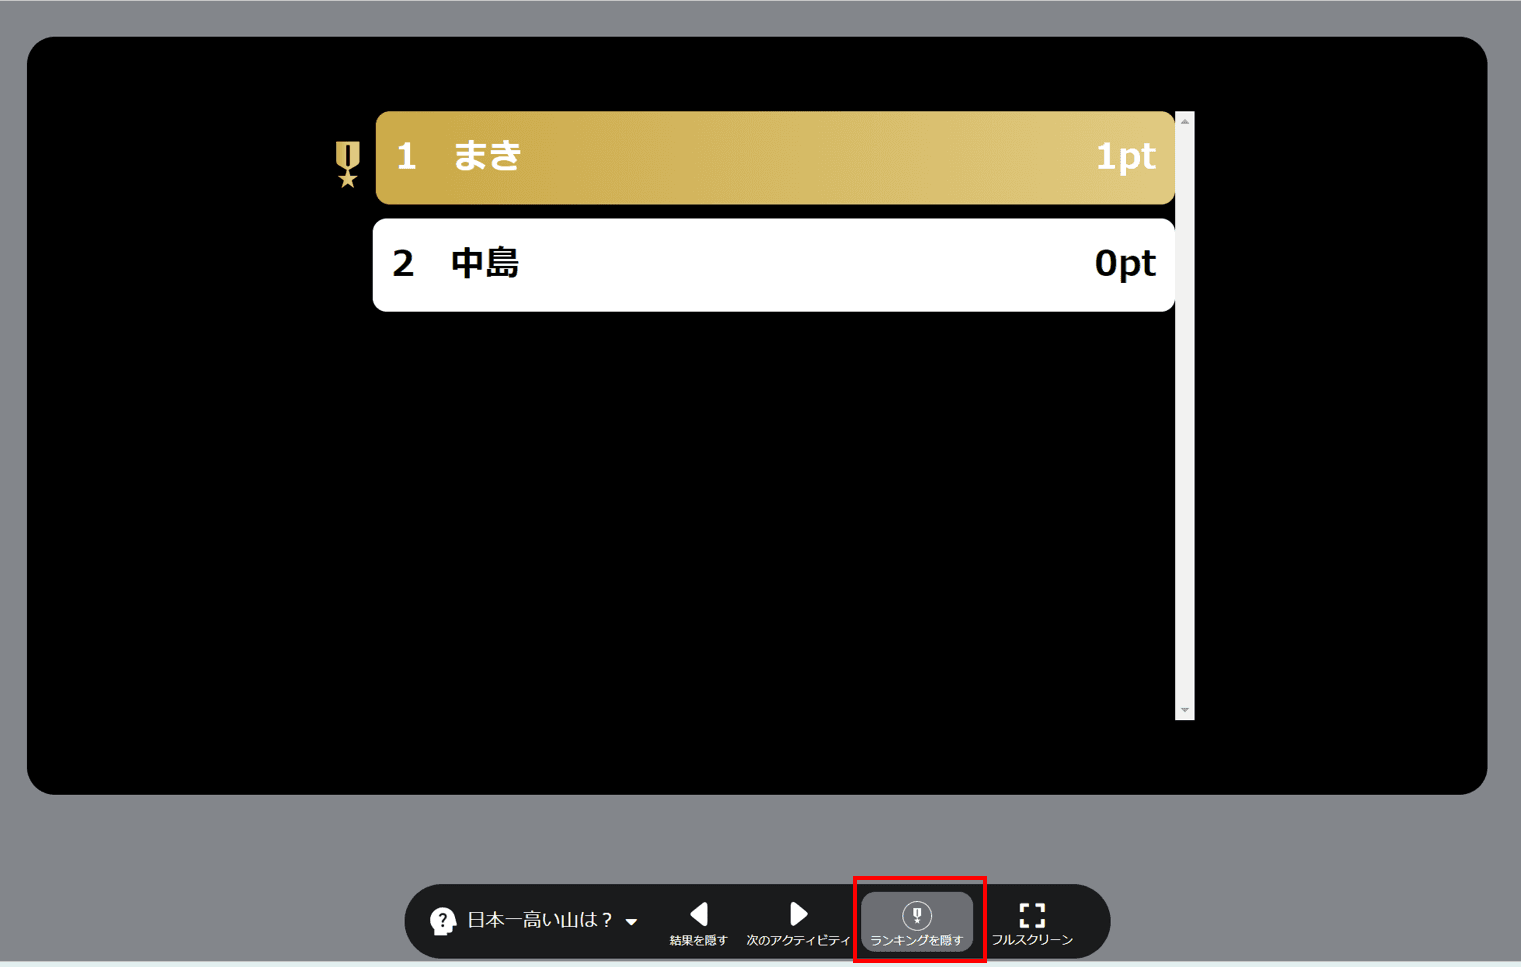
Step 9. Click Ranking to display the leaderboard.
Each correct answer earns one point. Rankings are based on the total score across all questions.
8. Display the Question List
Step 1. Under Start presentation, select Start with the web version.
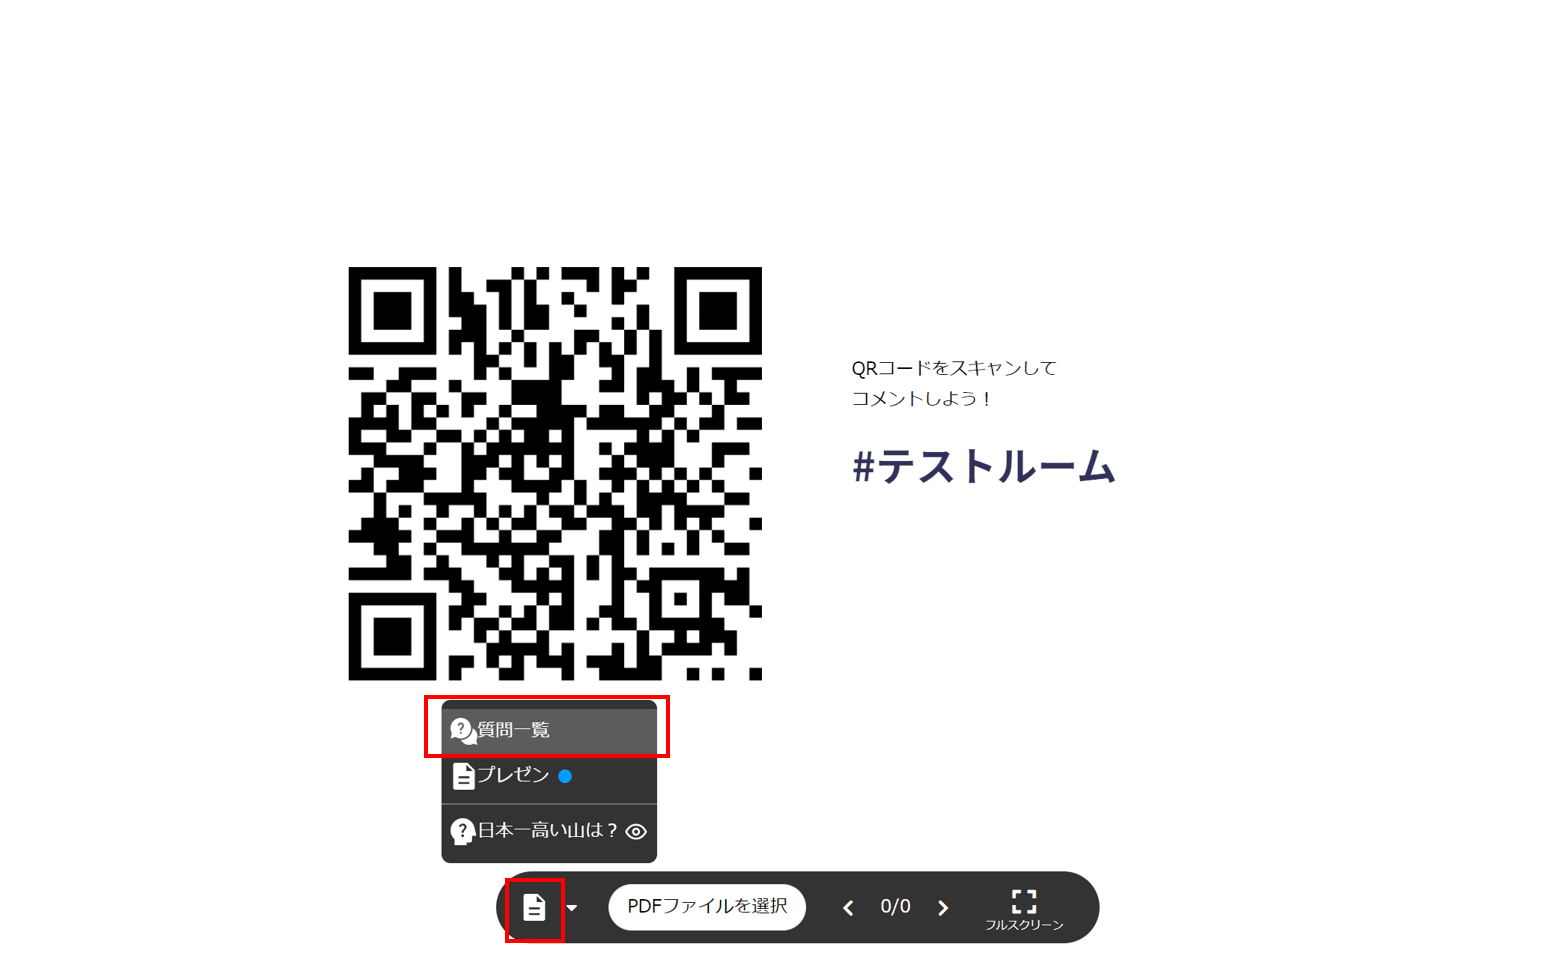
Step 2. Click the note-shaped icon and select Questions.
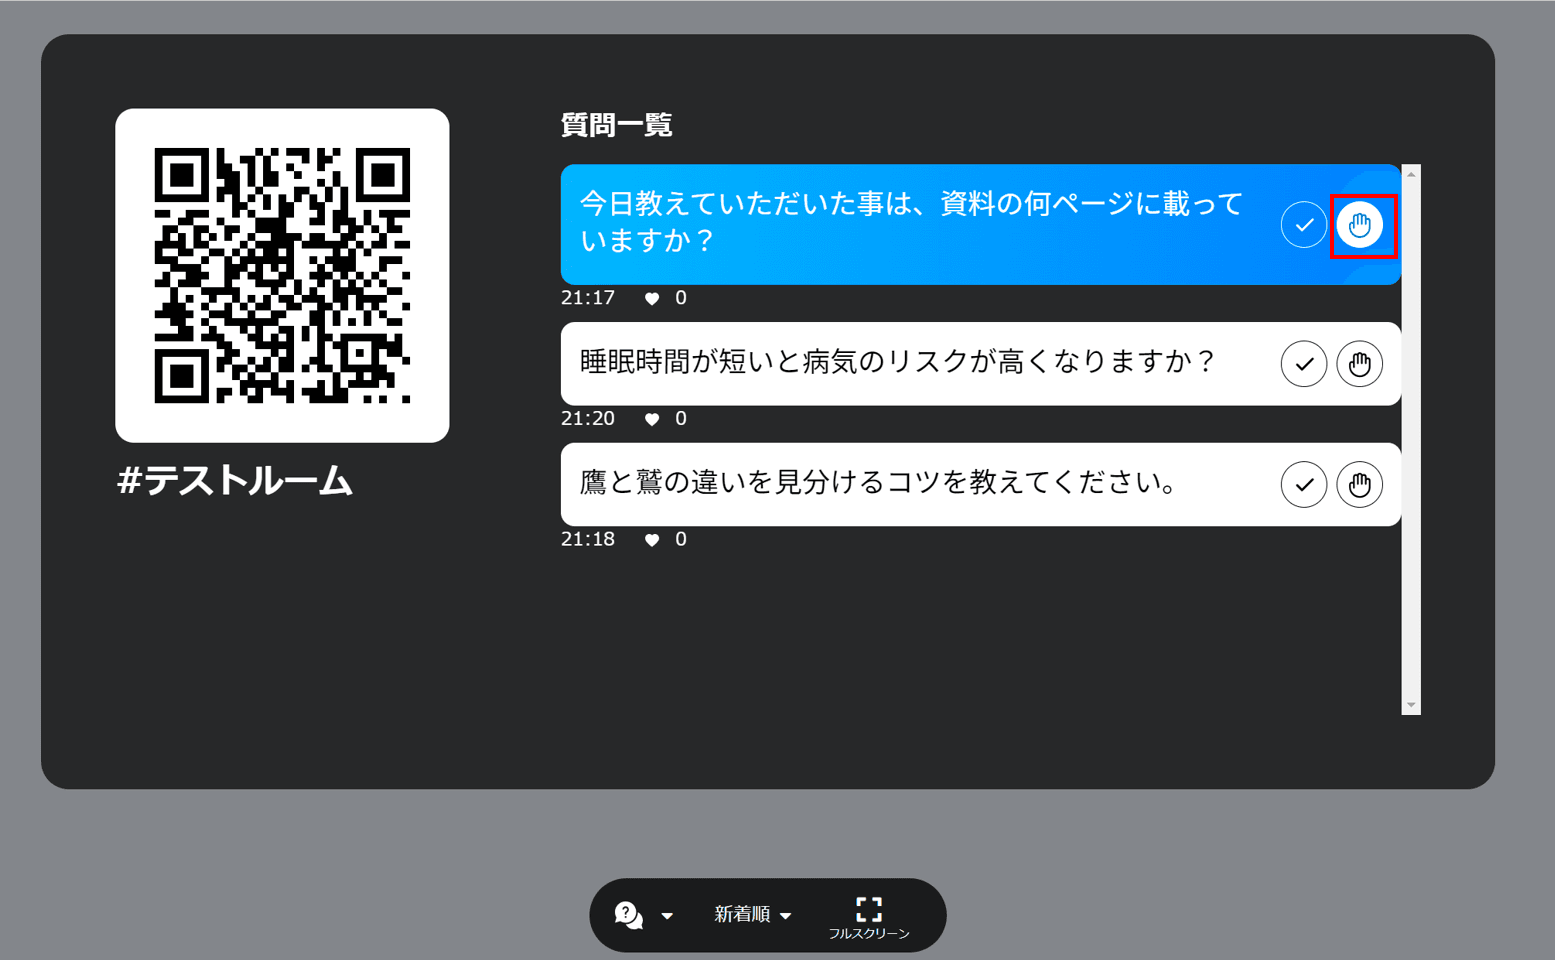
Step 3. Click the hand icon to move the selected question to the top and highlight it in blue.
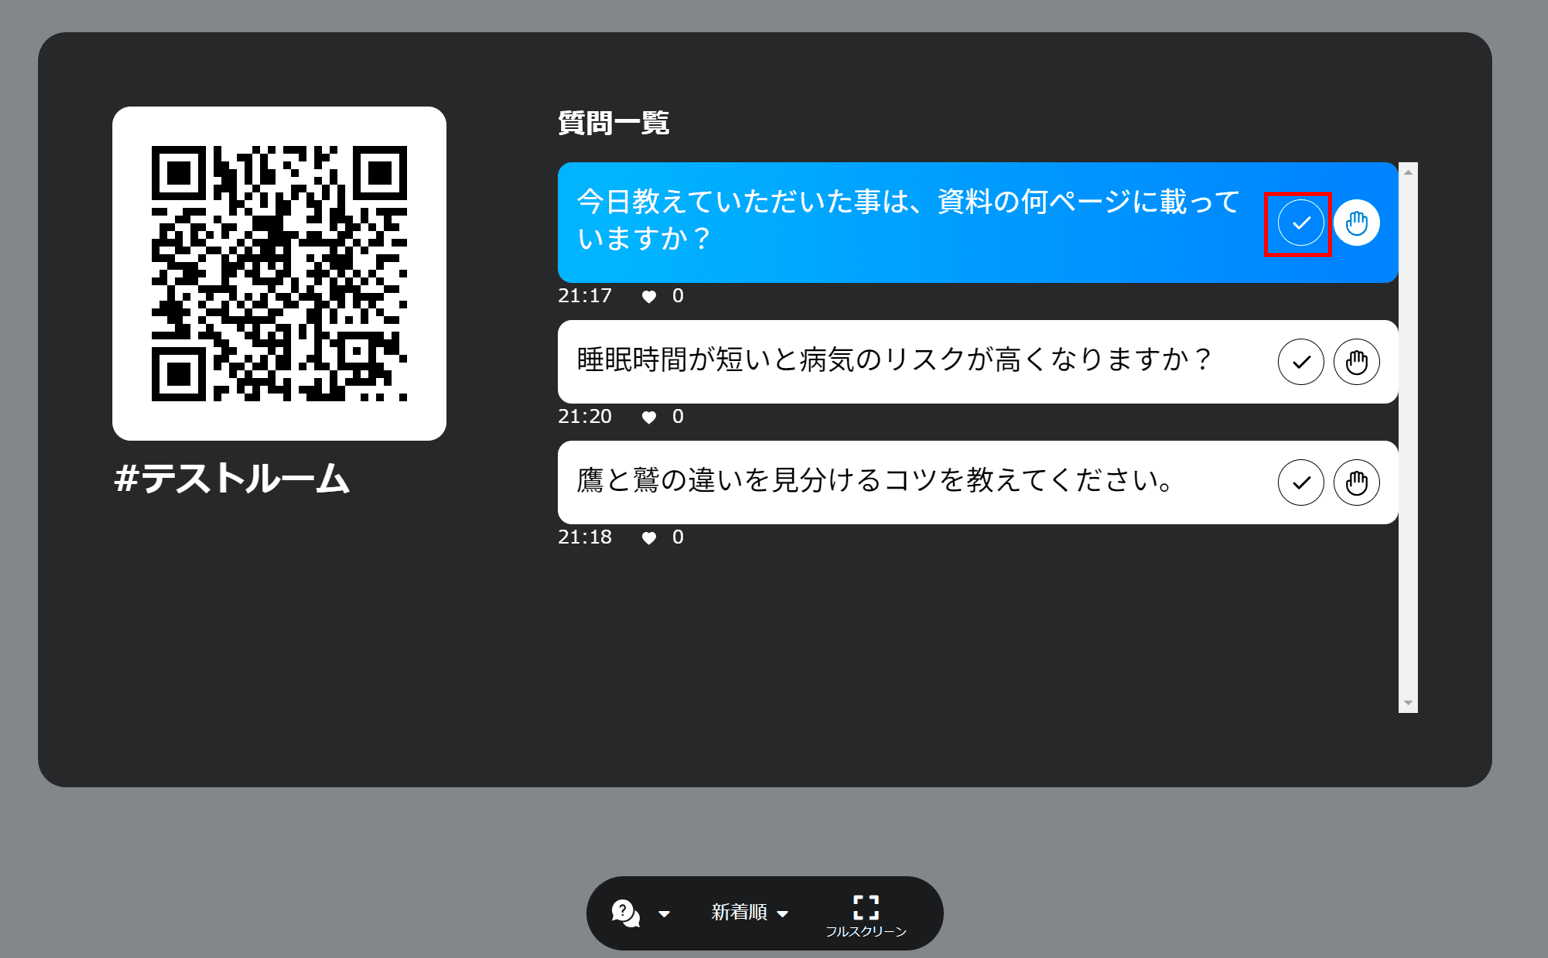
Step 4. Click the checkmark icon to remove the question from the list and send its text scrolling across the screen from right to left.
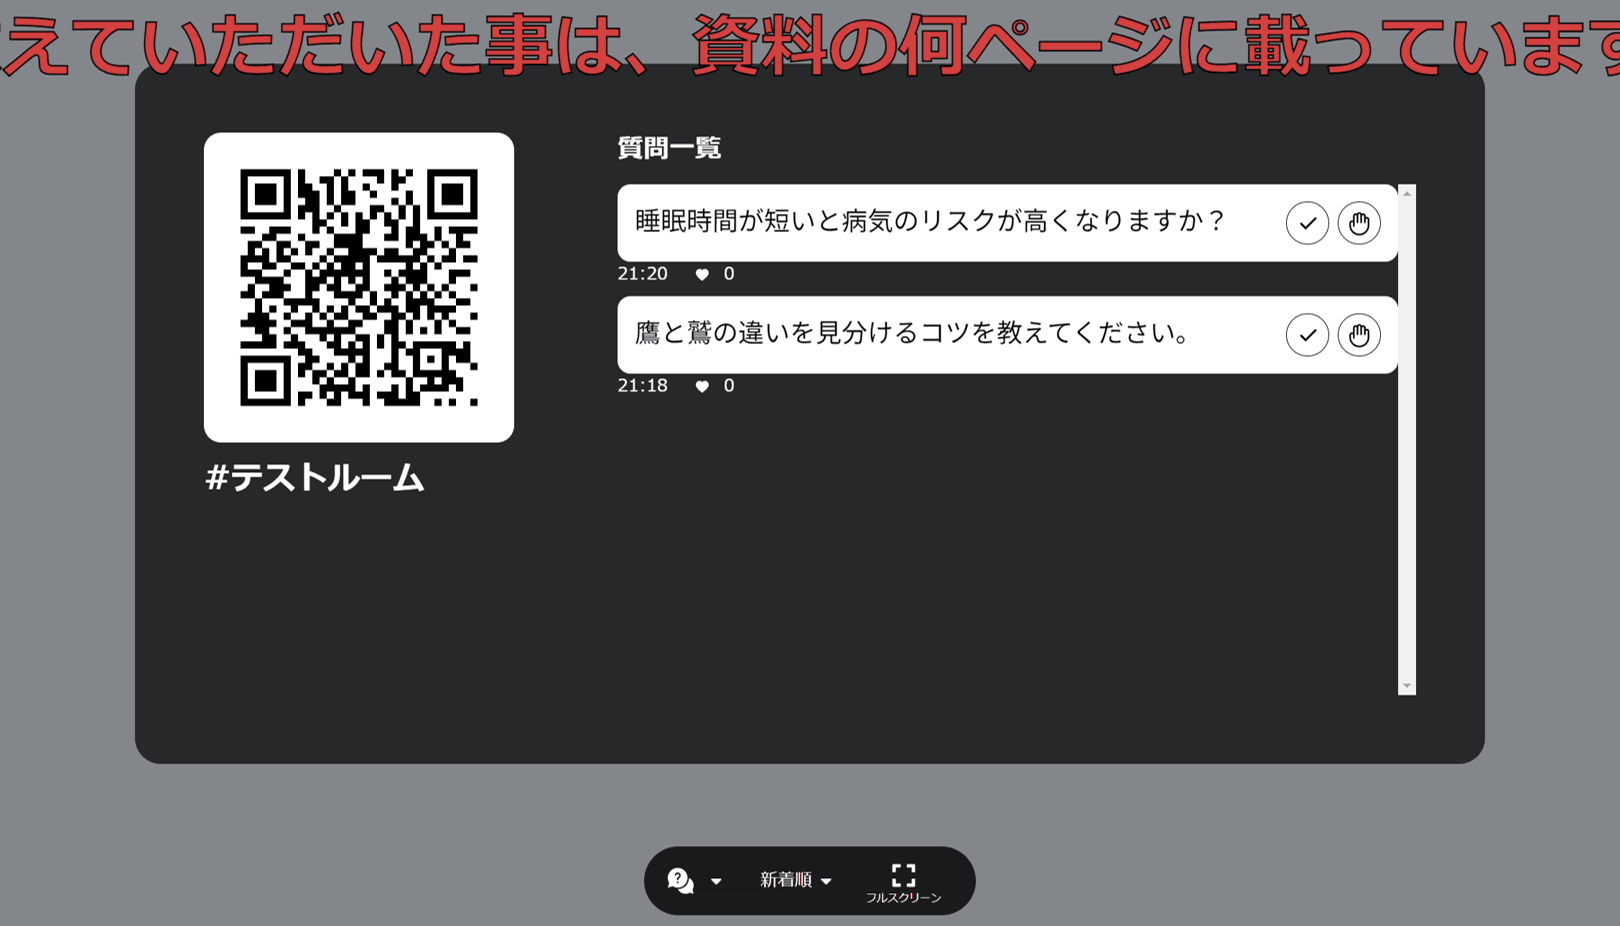
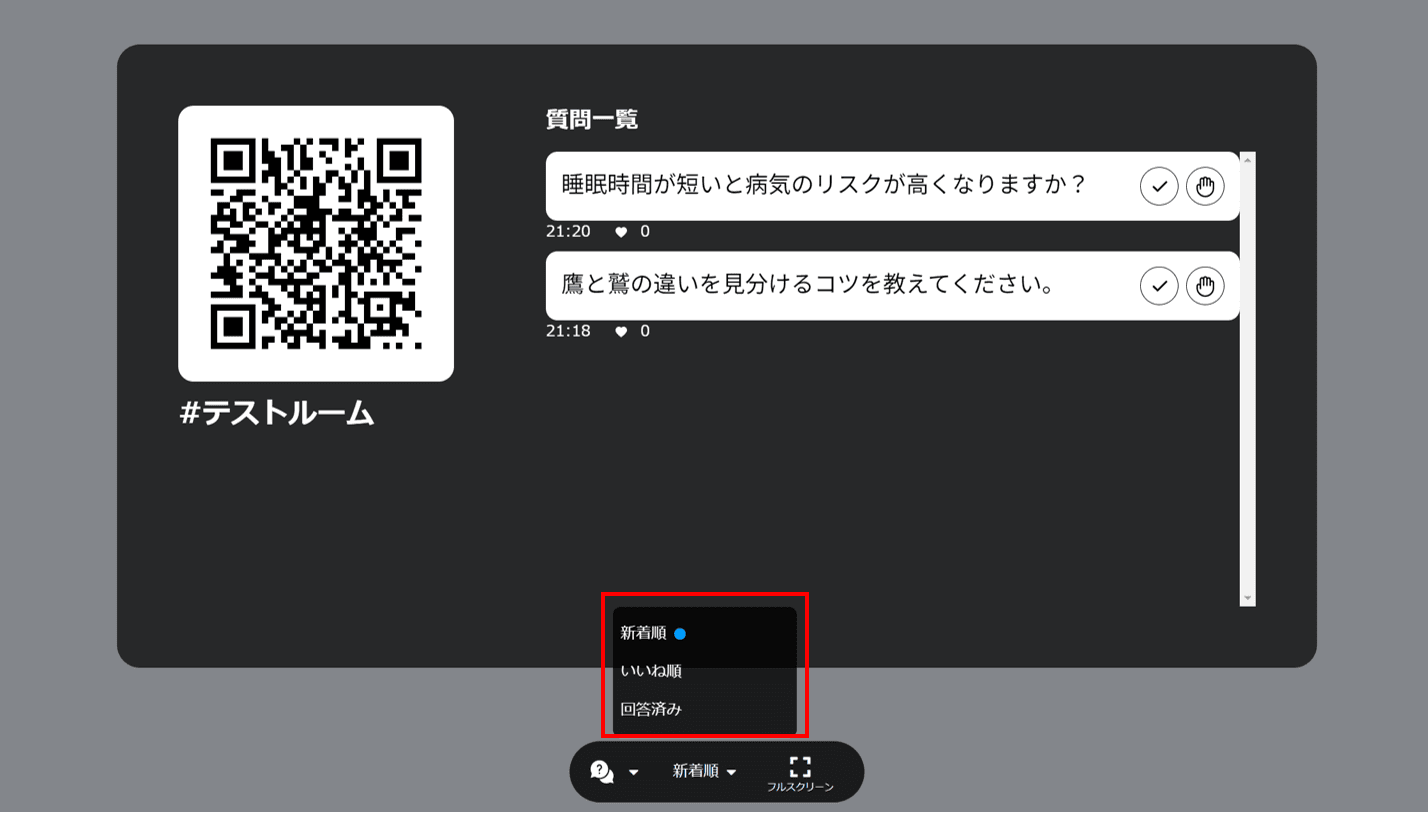
Step 5. Sort questions by Newest, Most liked, or Answered.